
Site illuminance calculations often feel intimidating, but they’re straightforward once you understand the basics. Most contractors and property owners either guess at light levels or rely on incomplete data, which leads to projects that underperform or waste energy.
At OpenLumen, we’ve seen firsthand how proper illuminance calculations transform outdoor lighting design. This guide walks you through the real-world process so you can get it right the first time.
Understanding Illuminance in Real Projects
Illuminance is simply the amount of light falling on a surface, measured in lux (lx), which equals one lumen per square meter. On a parking lot, a building facade, or a residential pathway, illuminance tells you exactly how bright that surface is. This matters because light level directly impacts safety, visibility, and energy cost.
A parking lot that receives only 5 lux feels unsafe and creates liability; one that gets 15–20 lux provides adequate visibility for vehicle and pedestrian movement without wasting power. The difference between guessing and calculating is the difference between a project that works and one that fails.
Why Most Contractors Get It Wrong
Most contractors estimate coverage based on fixture count alone, ignoring beam spread, mounting height, and reflectance of the surfaces below. That approach leaves dark spots, creates glare hotspots, and burns through energy budgets. Proper illuminance calculation prevents all three.
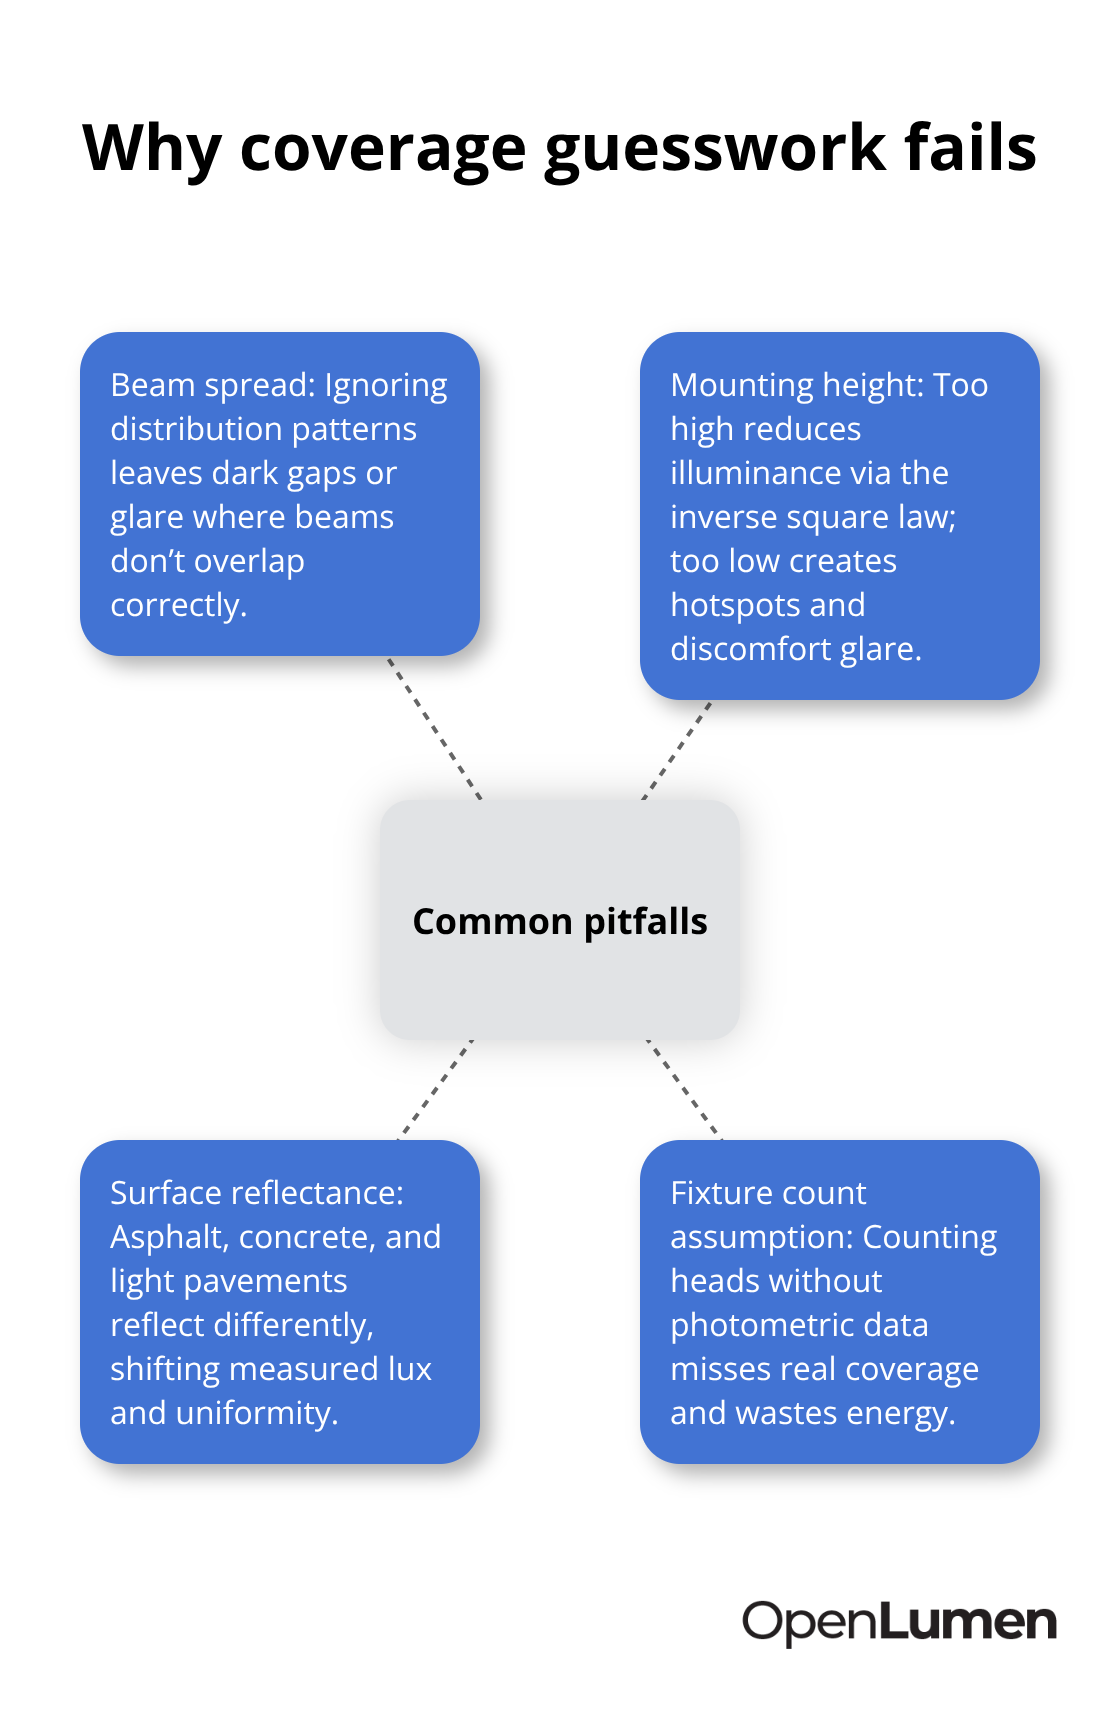
The inverse square law governs how light spreads: illuminance decreases with the square of distance from the source. Move a fixture twice as far from a surface, and illuminance drops to one-quarter. This is why a 3,000-lumen fixture at 20 feet delivers far less light than the same fixture at 10 feet.
When you know a luminaire’s luminous intensity distribution from its photometric data, you can calculate the exact illuminance at any point using the formula E equals I divided by d squared, where I is intensity in candelas and d is distance in meters. This removes guesswork entirely.
Measuring Light on Site
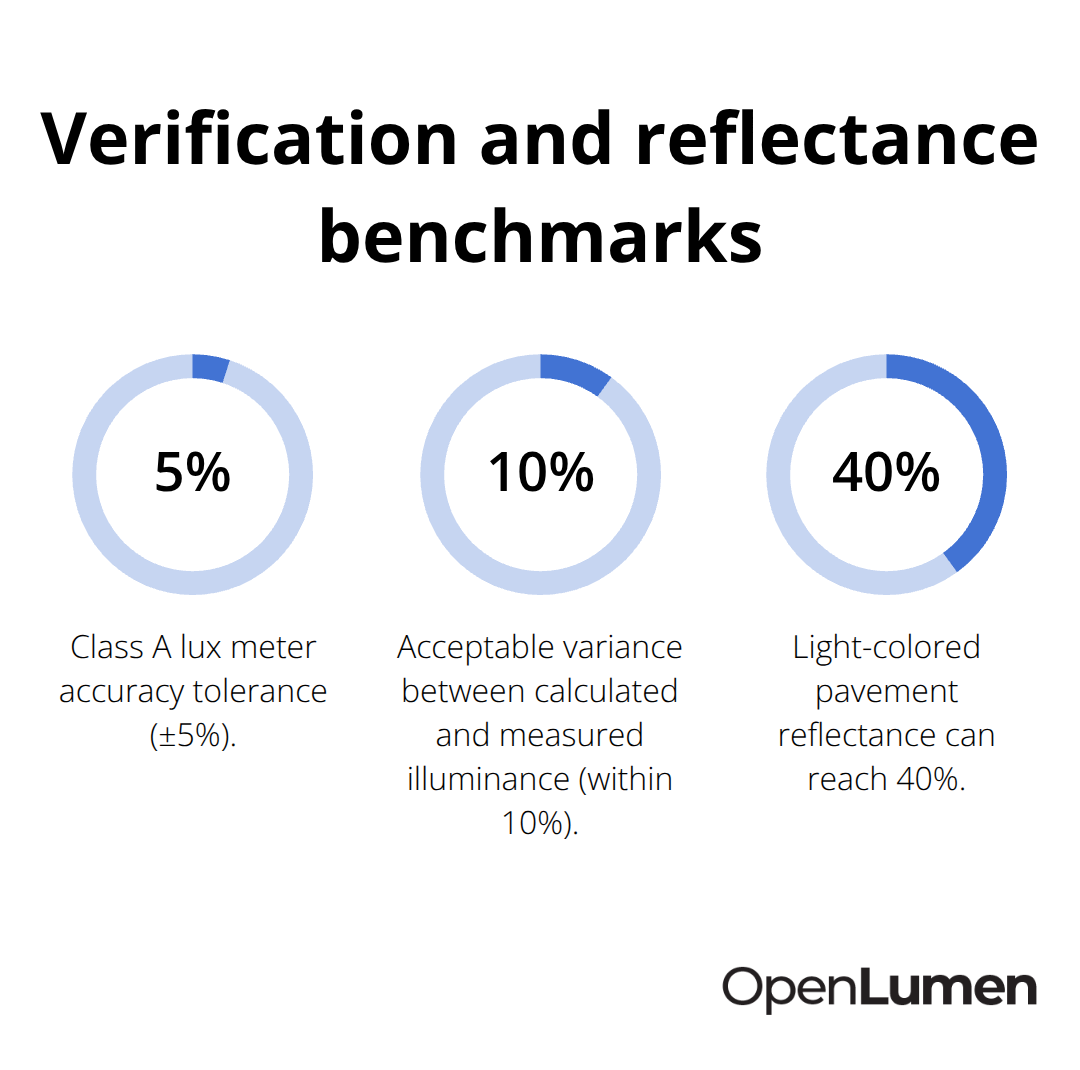
Field measurement requires a calibrated lux meter with Class A tolerance (plus or minus 5 percent accuracy) to verify that your calculations match reality. Smartphone light sensors are uncalibrated and unreliable; they typically drift by 20–40 percent and skew results.
Position the meter sensor flat against the surface you’re measuring, keep it parallel to that surface, and avoid casting shadows over it. Take readings at multiple points across the area-not just the center-because illuminance varies with distance and beam overlap. A professional measurement catches installation errors, verifies that mounting heights match the design, and confirms that fixture aiming angles are correct before you hand off the project. Skipping this step costs more in callbacks and warranty claims than the meter itself.
How Calculations Protect Your Budget
Illuminance calculations force you to think through every variable before installation. You specify exact fixture counts, spacing, and mounting heights based on your target light level and the actual beam characteristics of the luminaires you’ve chosen.
When you design a 10,000-square-foot parking lot with a target of 15 lux, you calculate the total lumens needed (roughly 150,000 lumens for that area), then select fixtures and arrange them so their light overlaps by 10–20 percent to avoid dark gaps. Without that calculation, you might install too many fixtures and waste 30 percent of your budget, or too few and create unsafe zones.
Industrial lots often need 30,000–70,000 total lumens depending on size and activity level; residential areas typically require 12,000–18,000 lumens. These ranges exist because they’re tied to real safety standards and visibility thresholds, not opinion.
Building Client Confidence
Contractors who calculate illuminance also sell better. A client who sees a photometric layout showing exactly where light hits and how bright each zone will be trusts the design and approves faster than one shown only a product photo and a promise. This confidence translates into faster approvals, fewer design revisions, and stronger relationships that lead to repeat work.
The next step is learning the actual methods and tools that make these calculations fast and accurate-without requiring expensive software or years of experience.
How to Read Photometric Data and Calculate Illuminance Fast
Photometric Data: Your Design Foundation
Photometric data forms the foundation of every accurate illuminance calculation, yet most contractors treat it as optional background information. The datasheet for any outdoor luminaire contains a polar intensity distribution chart that shows exactly how many candelas the fixture produces at each angle. This chart is your roadmap-without it, you work blind. The intensity distribution provides the luminous intensity (I) value you need for the inverse square law formula: E equals I divided by d squared. Find the intensity at the angle pointing toward your measurement surface, plug in the distance, and you have the illuminance at that point.
A 3,000-lumen fixture with a 40-degree beam spread produces vastly different intensity values than a 3,000-lumen fixture with a 120-degree spread, even though the total lumens are identical. One concentrates light; the other spreads it. Contractors who skip this step often select fixtures based on lumen count alone, then wonder why their layouts fail.
The photometric data also includes zonal lumens, which break down how many lumens fall within specific beam angles. If your design requires light to hit a 30-foot-wide area from a 25-foot mounting height, the zonal lumens table shows you immediately whether the fixture delivers enough light in that cone.
Map Your Site and Set Your Target
Real-world calculations demand that you map out your site geometry first. Measure or obtain the dimensions of the area you’re lighting, note the mounting heights of your fixtures, and identify the critical measurement surfaces where clients care most about brightness-the parking lot surface, the building face, or the pathway. Then select your target illuminance based on the application.
A commercial parking lot typically needs 15–20 lux for adequate vehicle and pedestrian visibility; a residential pathway works well at 5–10 lux; fine detail work or security-sensitive areas may demand 30 lux or higher. Once you know your target lux, multiply the area in square meters by that target to get total lumens needed. A 500-square-meter parking lot at 15 lux requires roughly 7,500 lumens total.
Calculate Fixture Count and Spacing
Use the luminaire’s intensity distribution and your mounting heights to calculate how many fixtures you need and where to space them. Software tools let you input your site dimensions, select fixtures from a library, and generate a photometric layout that shows illuminance at any point across your design surface. The software calculates spacing automatically and flags dark spots so you can adjust fixture placement before installation. Without this tool, you rely on manual calculations using the inverse square law at multiple points, which consumes time and introduces errors.
Verify Your Design on Site
Field verification with a calibrated Class A lux meter at 5–10 measurement points across the site confirms that your design matches reality. Position the meter flat against the surface, keep it parallel, and avoid casting shadows over it. Document the readings and compare them to your calculated values; if they’re within 10 percent, your design is solid. Larger discrepancies signal installation errors like incorrect mounting height, wrong fixture aiming angle, or surface reflectance lower than expected.
Catching these issues before final handoff prevents costly callbacks and protects your reputation. The next step is learning how to avoid the most common calculation mistakes that contractors make-and how small adjustments to your process can save thousands in wasted fixtures and energy costs.
Getting Your On-Site Measurements Right
The gap between calculated illuminance and actual field results destroys contractor credibility faster than anything else. Most of that gap stems from three preventable mistakes: incorrect meter placement, wrong surface selection for measurement, and fixture aiming angle drift during installation. A Class A lux meter costs $300–$800, but skipping field verification costs thousands in callbacks.
Position Your Meter Correctly
Position your meter sensor flat and parallel to the surface you’re measuring, then rest it directly on that surface without tilting. Shadows cast by your body, a clipboard, or nearby objects corrupt the reading by 15–30 percent, so measure from the side or have someone else hold the meter while you stay clear of the beam path. Take readings at a minimum of nine points across your site in a grid pattern, not just three or four in convenient locations. A 10,000-square-foot parking lot needs measurements at the perimeter, the center, and at least two intermediate zones to catch dark spots where fixture beams don’t overlap sufficiently. Document every reading with GPS coordinates or a marked site map so you can correlate low readings to specific fixture positions and correct aiming angles or spacing before final approval.
Account for Surface Reflectance
Surface reflectance matters more than contractors realize because the inverse square law assumes you’re measuring light hitting the surface, not light bouncing back from it. Asphalt reflects roughly 7–10 percent of incident light, concrete reflects 20–30 percent, and light-colored pavement can reach 40 percent. If your calculation assumed concrete but the site has dark asphalt, your measured illuminance will run 20–25 percent lower than predicted. Obtain a reflectance value from the site owner or use a handheld reflectometer to measure the actual surface before finalizing your design.
Control Fixture Aiming and Height Variables
Fixture aiming angle and mounting height are the two variables that shift most during installation, and small errors compound dramatically. A fixture aimed 5 degrees off vertical from a 25-foot height will miss your target measurement surface by 2–3 feet horizontally, dropping illuminance by 30–40 percent at that point. Train your installation crew to use a digital level and a measuring tape to verify mounting height within 6 inches and aiming angle within 2 degrees. Industrial and high-security parking lots often need 40,000–70,000 total lumens across the entire area, which demands tight spacing and overlap; residential pathways work at 12,000–18,000 total lumens and tolerate wider fixture spacing. The difference isn’t opinion-it’s tied to visibility thresholds and safety standards.
Match Color Temperature and Rendering Specifications
For applications where color accuracy matters, such as retail facades or hospitality zones, white LED color temperature and color rendering index affect perceived brightness and client satisfaction. A 3000K warm white LED renders reds and oranges more vividly than a 5000K cool white, so the same illuminance feels brighter and more inviting at warm color temperatures. If your client specifies a particular color temperature, verify that your selected fixtures match that specification on the datasheet and that your photometric calculations use intensity values for that exact product, not a generic proxy. Overlooking this detail leads to mismatched fixture deliveries and installation delays.
Final Thoughts
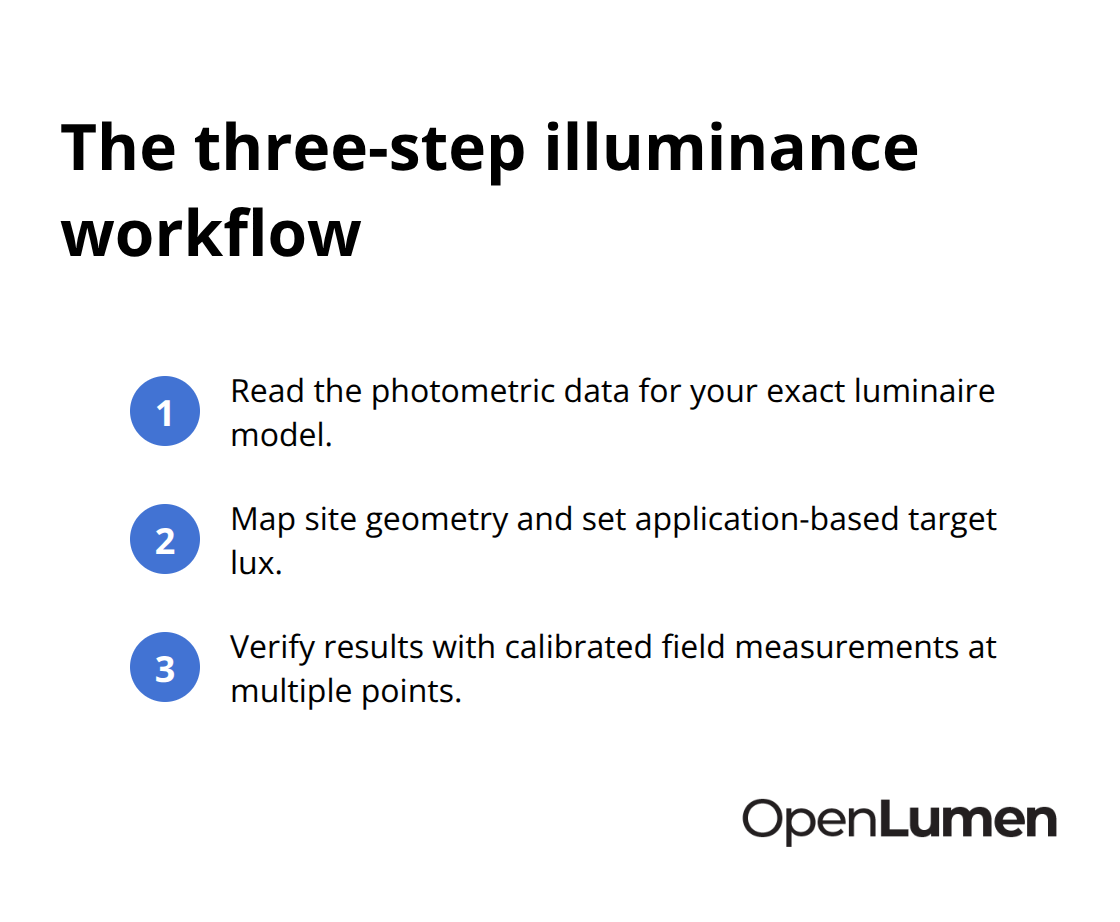
Site illuminance calculations stop being intimidating once you understand that they rest on three concrete steps: reading photometric data, mapping your site geometry, and verifying results with field measurements. Skip any one of these, and your project underperforms or wastes money. Follow all three, and you deliver work that clients trust and that performs exactly as promised.
Contractors who calculate site illuminance systematically close projects faster because clients see photometric layouts that prove the design works. Approvals happen quicker, change orders drop, and callbacks disappear. A parking lot designed to 15 lux with verified fixture spacing and mounting heights performs as specified; one built on guesswork creates liability and warranty claims that eat profit margins. Proper calculations also protect your energy budgets-oversizing a fixture layout by 30 percent wastes thousands in wattage and operating costs over the fixture lifetime, while undersizing creates dark spots that force expensive retrofits.
Start your next project by obtaining the photometric data for your selected fixtures, mapping your site dimensions, and calculating total lumens needed based on your target illuminance. Then use software to generate a layout, verify it with field measurements at multiple points, and document everything before installation. OpenLumen provides a free browser-based platform that lets you build photometric layouts, run real-time illuminance analysis, and generate professional reports without expensive software or steep learning curves.
The information provided is for general educational purposes only and should not be considered professional engineering or lighting design advice. Always verify project requirements, local codes, and specifications with qualified professionals before making final decisions.


