
Poor office lighting tanks productivity and wastes money. Employees working under dim or uneven light experience more eye strain, headaches, and fatigue-which directly cuts output and increases sick days.
Photometric layouts for offices solve this problem by strategically positioning lights to deliver the right brightness in the right places. At OpenLumen, we’ve seen how proper lighting design reduces energy costs by 20–30% while boosting employee performance.
This guide walks you through creating efficient, compliant office lighting that actually works.
Why Proper Office Lighting Transforms Performance and Costs
Poor Lighting Kills Productivity and Morale
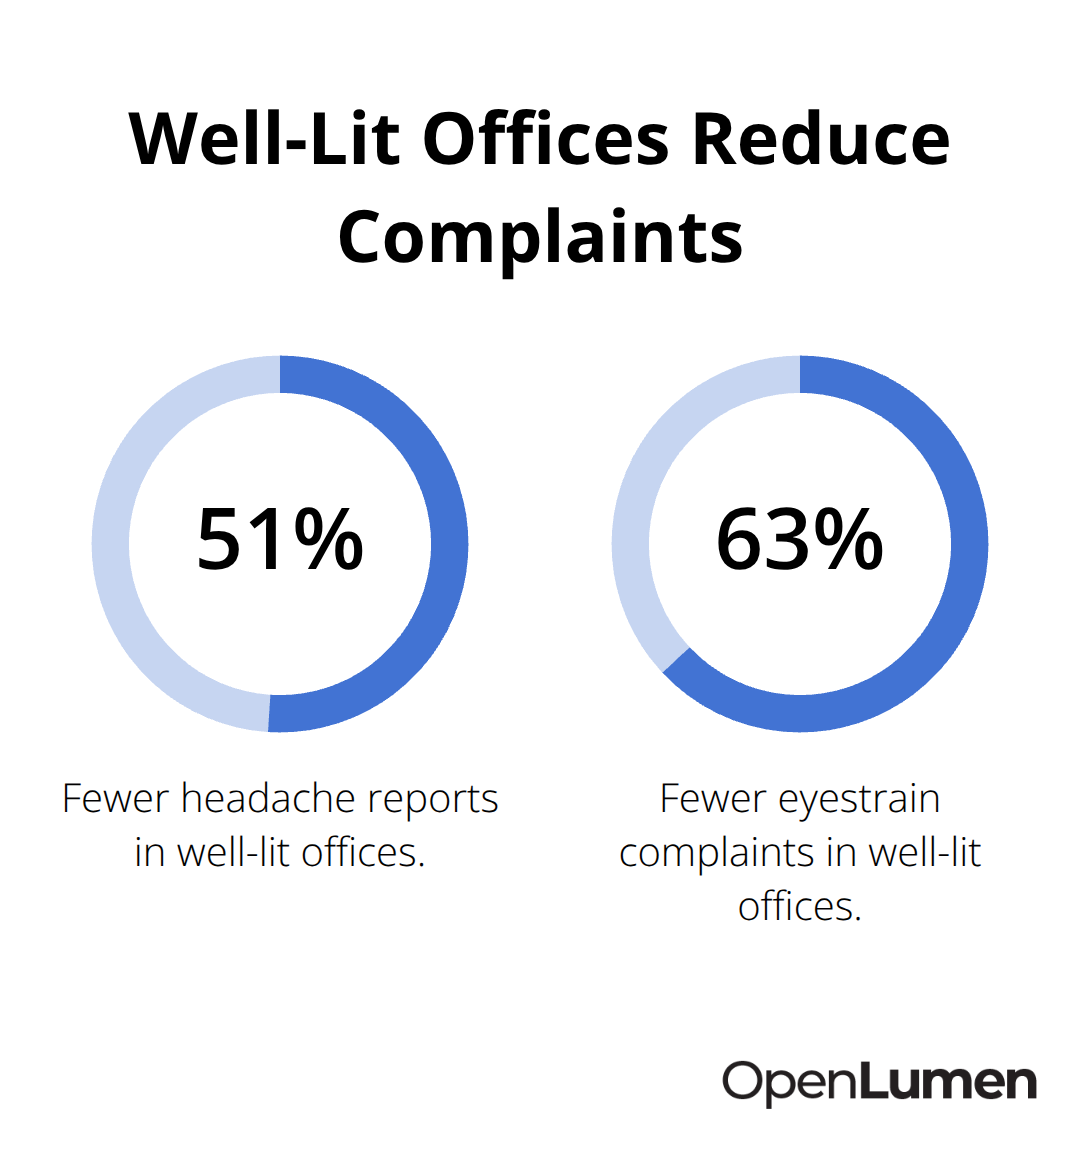
Poor lighting doesn’t just feel bad-it measurably tanks performance. Research from the American Society of Interior Designers found that employees in well-lit offices report 51% fewer headaches and 63% fewer eyestrain complaints than those working under inadequate lighting. That difference translates directly to fewer sick days, higher focus, and better output.
The Illuminating Engineering Society recommends 30–50 footcandles for standard office tasks, yet many facilities fall far short or create uneven coverage that forces employees to squint at screens or documents. When lighting varies across your office-bright in some zones, dim in others-your team wastes mental energy compensating for poor visibility instead of concentrating on actual work. Photometric layouts fix this problem by mapping exact light levels before installation, so every workstation receives the illuminance it needs.
Energy Savings Hit Hard and Fast
The financial case for proper office lighting stands on solid ground. A well-designed photometric layout cuts energy consumption by 20–50% compared to standard installations, depending on how much you optimize fixture placement and add controls like occupancy sensors and daylight harvesting. That’s not theoretical-warehouses that upgraded from 450-watt metal halide fixtures to 120-watt LED high bays achieved roughly 70% energy reductions. For offices, the savings compound because you control lights across larger square footage. An office that spends 15–20% of its energy budget on lighting can recover 3–6% of total energy costs annually through smarter design. Smart controls amplify this advantage further: networked lighting controls paired with LEDs and dimming systems can drive energy savings up to 80%, with the control layer alone adding roughly 47% more efficiency gains beyond what LEDs deliver solo. These numbers matter for your bottom line and your sustainability commitments.
Meeting Code Keeps You Out of Trouble
Compliance isn’t optional, and it’s not a one-size-fits-all matter. Local codes in different regions set minimum illuminance standards, glare limits, and light-trespass rules that vary by building type and use. A photometric layout created using methods recommended by the Illuminating Engineering Society of North America ensures your design meets those standards before a single fixture goes in the ceiling. This prevents costly redesigns, delays, or fines after installation. Utility rebates in many areas also reward energy-efficient designs backed by solid photometric documentation-meaning your compliance work directly reduces project costs. Getting the layout right upfront protects you legally and financially, and it sets the stage for the practical steps that follow.
Building a Photometric Layouts That Actually Works
Measure Your Space and Define Task Requirements
Measure your office space with precision-ceiling height, wall reflectance, desk positions, and any obstacles like HVAC equipment or structural beams. The Illuminating Engineering Society recommends 30–50 footcandles for standard office tasks, but this varies by work type. Detail-oriented work like drafting or accounting requires 50 footcandles; general office tasks work at 30–40 footcandles. Once you know your space dimensions and task requirements, you can select fixtures with photometric data from manufacturers-this data feeds into simulation software and determines how light actually distributes across your floor.
Position Fixtures for Even Coverage and Comfort
Mount overhead ambient fixtures roughly twice the distance from walls to avoid dark corners, and space recessed fixtures about half the ceiling height apart with 3 feet clearance from walls. For task lighting at individual desks, position fixtures to eliminate screen glare by angling them 30–45 degrees away from monitor surfaces. Try for uniformity around 0.6–0.8 across your space to eliminate the eye strain that comes from constantly adjusting to brightness changes. If your office has windows, you can incorporate daylight harvesting controls that dim artificial lights as natural light increases; this alone reduces annual lighting energy use by 40–50% in properly oriented spaces.
Run Simulations Before You Install Anything
Use simulation software to test your design before ordering fixtures. These tools show exact footcandle levels at every point in your office, revealing dark spots and overlit zones you’d otherwise miss during installation. Simulation eliminates guesswork and prevents expensive on-site corrections. You can model obstructions and test multiple layouts in hours rather than weeks, which accelerates your decision-making and reduces procurement risk.
Layer Lighting for Function and Visual Interest
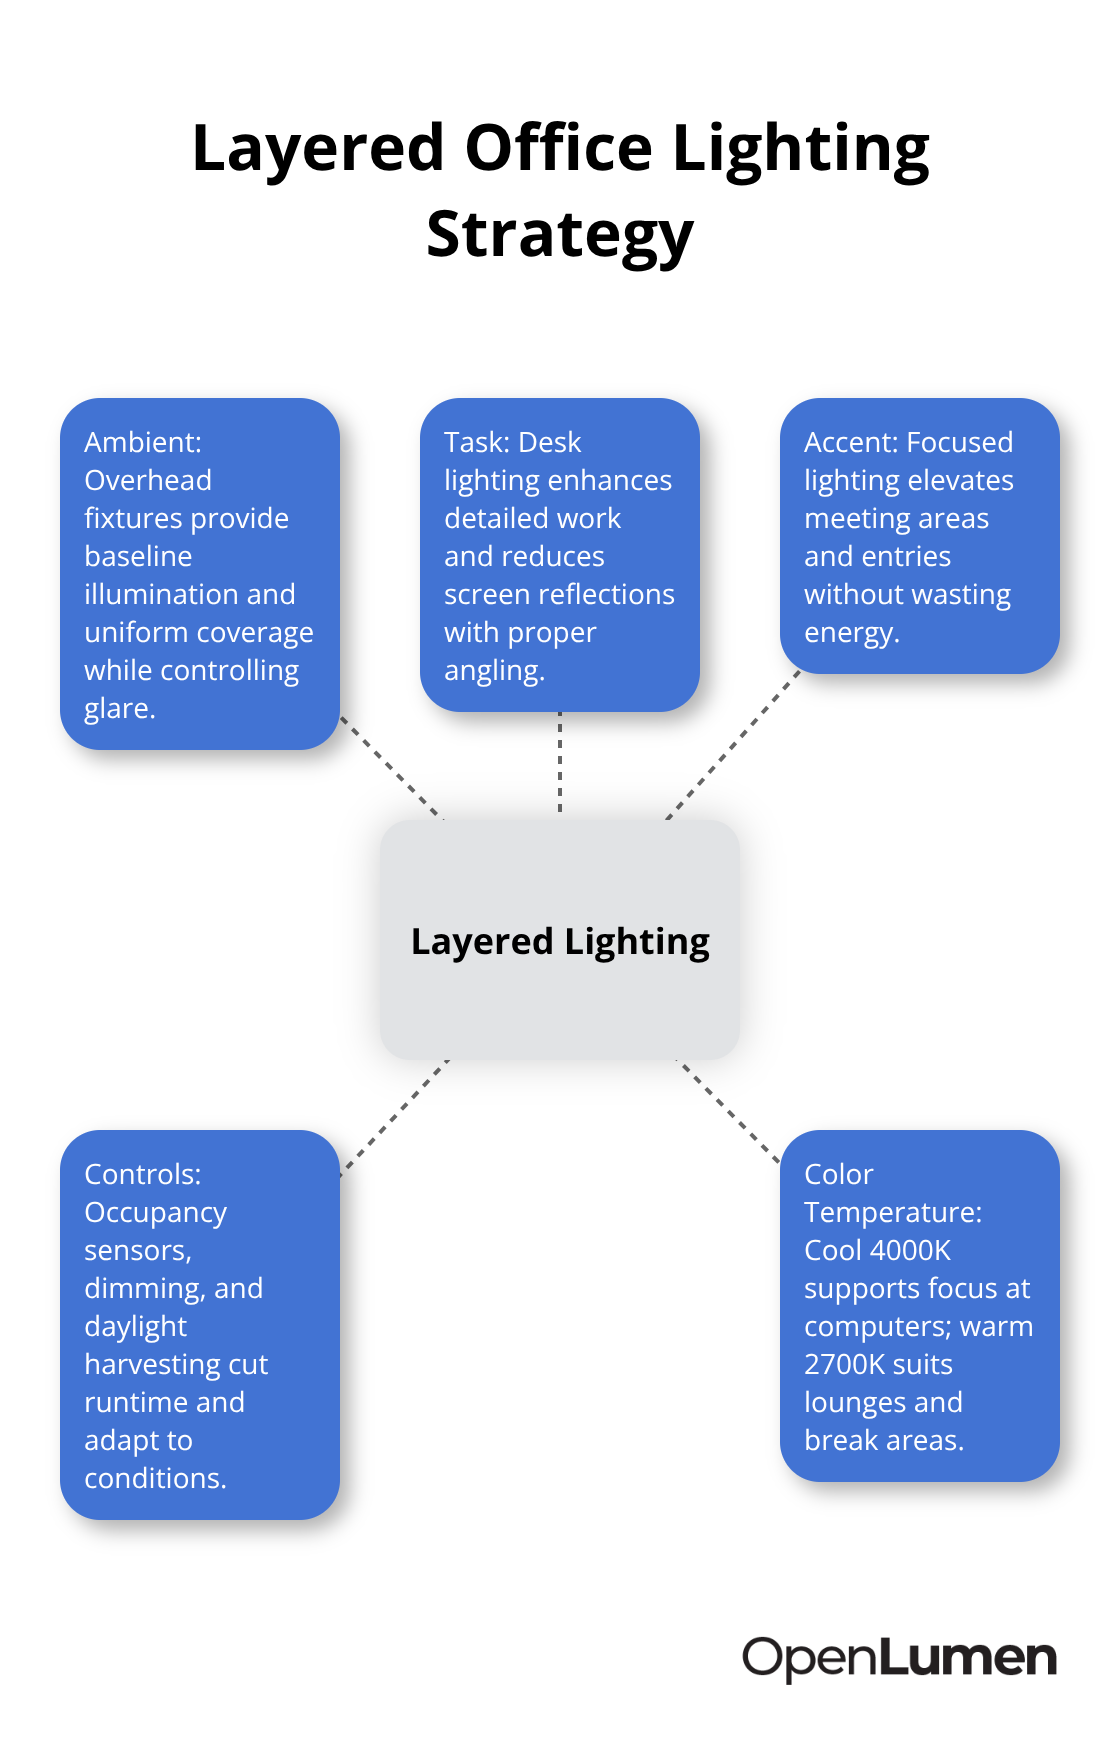
Combine ambient overhead lighting with task lighting at workstations and accent lighting for meeting areas or entryways-this approach balances functionality with visual interest while controlling glare and energy waste. Cool color temperature around 4000K boosts alertness and focus for computer work; warm light at 2700K suits break rooms and lounges. Include occupancy sensors in low-traffic areas like storage or backup offices to cut unnecessary runtime, and add dimmers to let occupants adjust brightness for individual preferences or time of day.
Validate Your Design With Real Users
Test your design on a smaller section of the office before full rollout-gather feedback from actual users about eye comfort and brightness, then adjust fixture placement or add task lighting where needed. This validation step prevents expensive mistakes and ensures your team accepts the final result. Energy savings of 20–30% are typical when designs are properly optimized, but offices that layer in smart controls, daylight harvesting, and occupancy sensors routinely hit 50% or higher. The upfront work of creating an accurate photometric layout pays for itself through lower utility bills, fewer headaches and eye-strain complaints from employees, and the confidence that your lighting meets all applicable codes before installation begins. Once you validate your design and confirm it performs as expected, you can move forward with confidence-and that’s where the right tools make all the difference in turning your plan into reality.
Tools and Best Practices for Office Lighting Design
Simulation Software Transforms Design Into Precision Engineering
Photometric simulation software eliminates guesswork and turns lighting design into measurable engineering. The right tool lets you test dozens of layouts in hours, catch problems before installation, and generate reports that satisfy code officials and clients alike. Most professional software requires expensive licenses and steep learning curves, but browser-based platforms now make photometric analysis accessible without the overhead.
When you run simulations, you input your space dimensions, ceiling height, wall reflectance, fixture locations, and manufacturer photometric data. The software then calculates exact illuminance at every point in your office. This output reveals dark corners, glare zones, and overlit areas that visual inspection alone would miss. The Illuminating Engineering Society of North America recommends this simulation-first approach because it eliminates the expensive on-site adjustments that plague rushed installations.
Real software outputs show footcandle heatmaps, uniformity ratios, and point-by-point calculations that prove your design meets the 30–50 footcandle targets for standard office work. You can test alternative fixture types, spacing, and mounting heights in parallel, which accelerates your decision-making and reduces procurement risk. Many platforms now include community-verified luminaire libraries with photometric data already loaded, eliminating manual data entry and the errors that come with it.
Avoid the Design Mistakes That Waste Energy and Money
The biggest design mistakes stem from skipping simulation entirely or trusting rough estimates instead of actual calculations. Offices that position fixtures without modeling often end up with 40% variation in light levels across the space, forcing employees to constantly adjust their position or posture to avoid glare and shadows. Uneven coverage also wastes energy because installers compensate for it through over-lighting bright zones to lift dim ones, defeating the efficiency gains you designed for.
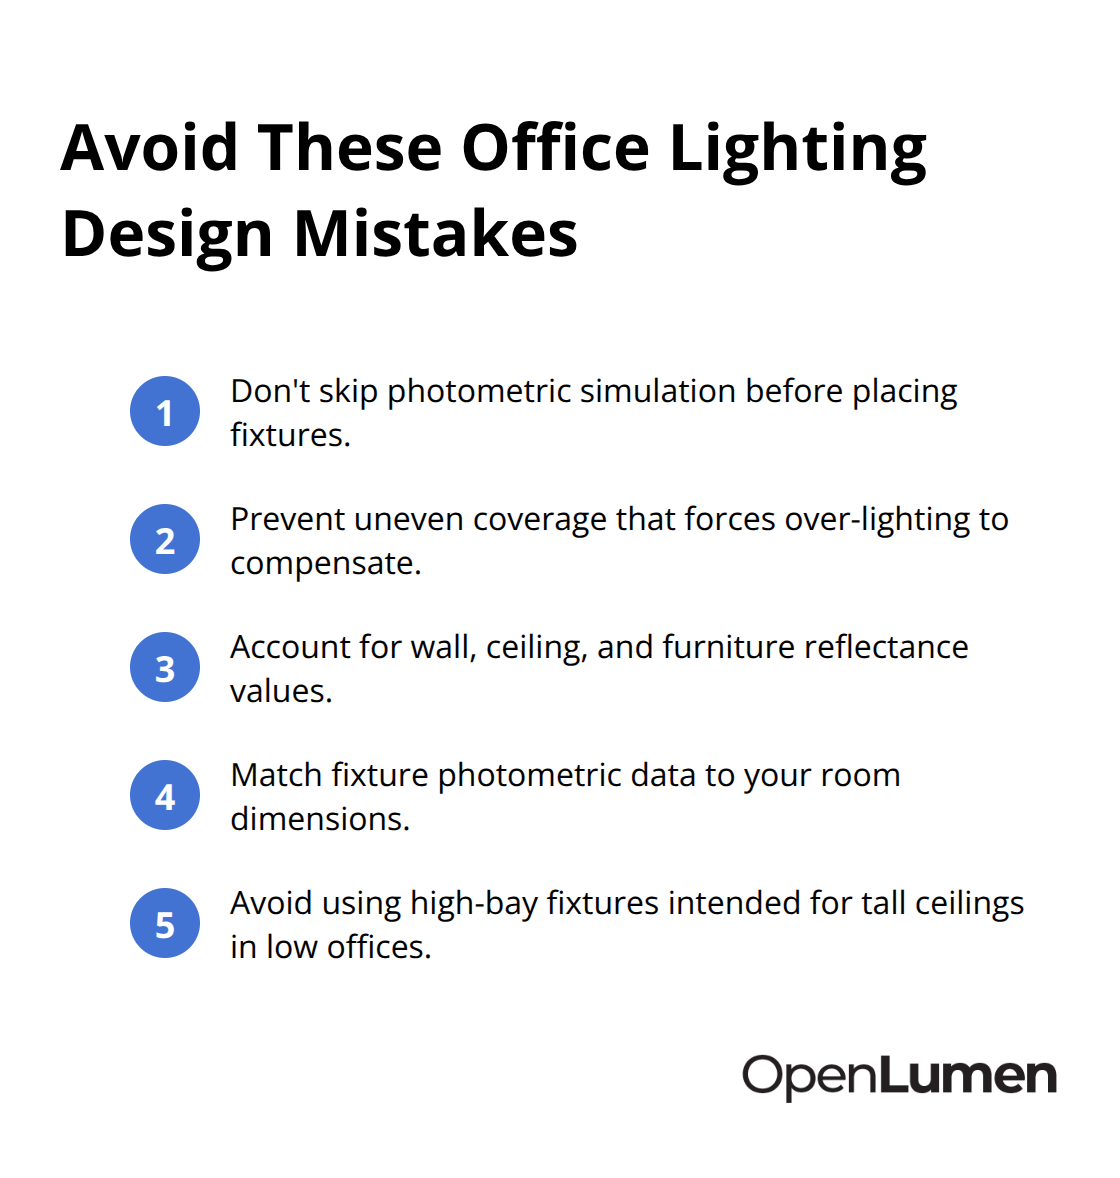
Another common error is neglecting reflectance values-walls, ceilings, and furniture reflect different amounts of light, and simulation software accounts for these factors while mental math does not. Ignoring these variables leads to designs that fail in real-world conditions. A third mistake involves selecting fixtures without checking their photometric data against your space dimensions; a fixture rated for 50-foot ceilings performs poorly in an 9-foot office, creating either glare or insufficient coverage.
Test Your Design With Real Users Before Full Rollout
Validation testing before full rollout catches mistakes before they cost thousands in corrections. Start with a single office section or floor, gather feedback from actual users about eye comfort and screen glare, then adjust fixture placement or add task lighting where the simulation didn’t account for real-world conditions like equipment placement or personal workspace setup. This feedback loop ensures your team accepts the final design and performs better under the new lighting.
Energy savings of 20–30% are typical for optimized designs, but offices that layer in occupancy sensors and daylight harvesting controls regularly exceed 50% reductions compared to standard installations. The validation step also reveals whether your color temperature choices (cool 4000K for focus areas, warm 2700K for lounges) actually match how occupants experience the space. Adjustments made during this phase cost far less than retrofitting after full deployment.
Choose Tools That Match Your Workflow and Budget
Browser-based platforms remove the barrier to entry that traditional software creates. OpenLumen offers a free, browser-based lighting platform that lets designers, contractors, distributors, and facility owners create photometric layouts, run real-time illuminance analysis, and generate professional reports without expensive software licenses or steep learning curves. Its community-verified luminaires library and instant photometric metrics streamline the design-to-install workflow so teams can design, sell, and validate lighting faster and with confidence.
Whether you choose a browser-based tool or traditional software, prioritize platforms that integrate manufacturer photometric data directly, offer real-time calculation updates, and produce reports that satisfy local code requirements. The tool itself matters less than your commitment to simulation before installation-that discipline alone prevents costly mistakes and delivers the energy savings and employee comfort your office deserves.
Final Thoughts
Photometric layouts for offices deliver measurable results: better employee performance, lower energy bills, and compliance with local codes. The three core principles-measuring your space accurately, positioning fixtures for even coverage, and validating designs before installation-transform lighting from guesswork into engineering. Offices that follow this approach consistently achieve 20–30% energy savings while eliminating the headaches and eye strain that plague poorly lit workspaces.
Digital tools make this process faster and more accessible than ever. Browser-based platforms remove the cost and complexity barriers that once locked photometric design behind expensive software licenses and steep learning curves. You can now test dozens of layouts in hours, catch problems before they become expensive mistakes, and generate reports that satisfy code officials without hiring specialized consultants.
Start with measuring your office space and defining task requirements for each zone, then run simulations to test fixture placement and spacing before ordering anything. Validate your design with real users in a pilot area, gather feedback, and adjust as needed. OpenLumen offers a free, browser-based lighting platform that handles photometric layouts, real-time illuminance analysis, and professional reporting without expensive software or complex training, letting you move from concept to installation faster and with confidence.
The information provided is for general educational purposes only and should not be considered professional engineering or lighting design advice. Always verify project requirements, local codes, and specifications with qualified professionals before making final decisions.


