
Most lighting layouts fail because they’re designed without real-world constraints in mind. We at OpenLumen have seen countless projects waste money on fixtures placed in the wrong spots, creating dark zones and wasted energy.
This post gives you photometric layout examples you can actually use-grids from retail stores, offices, and warehouses that work. Copy them, adapt them to your space, and skip the guesswork.
Retail Store Lighting That Actually Works
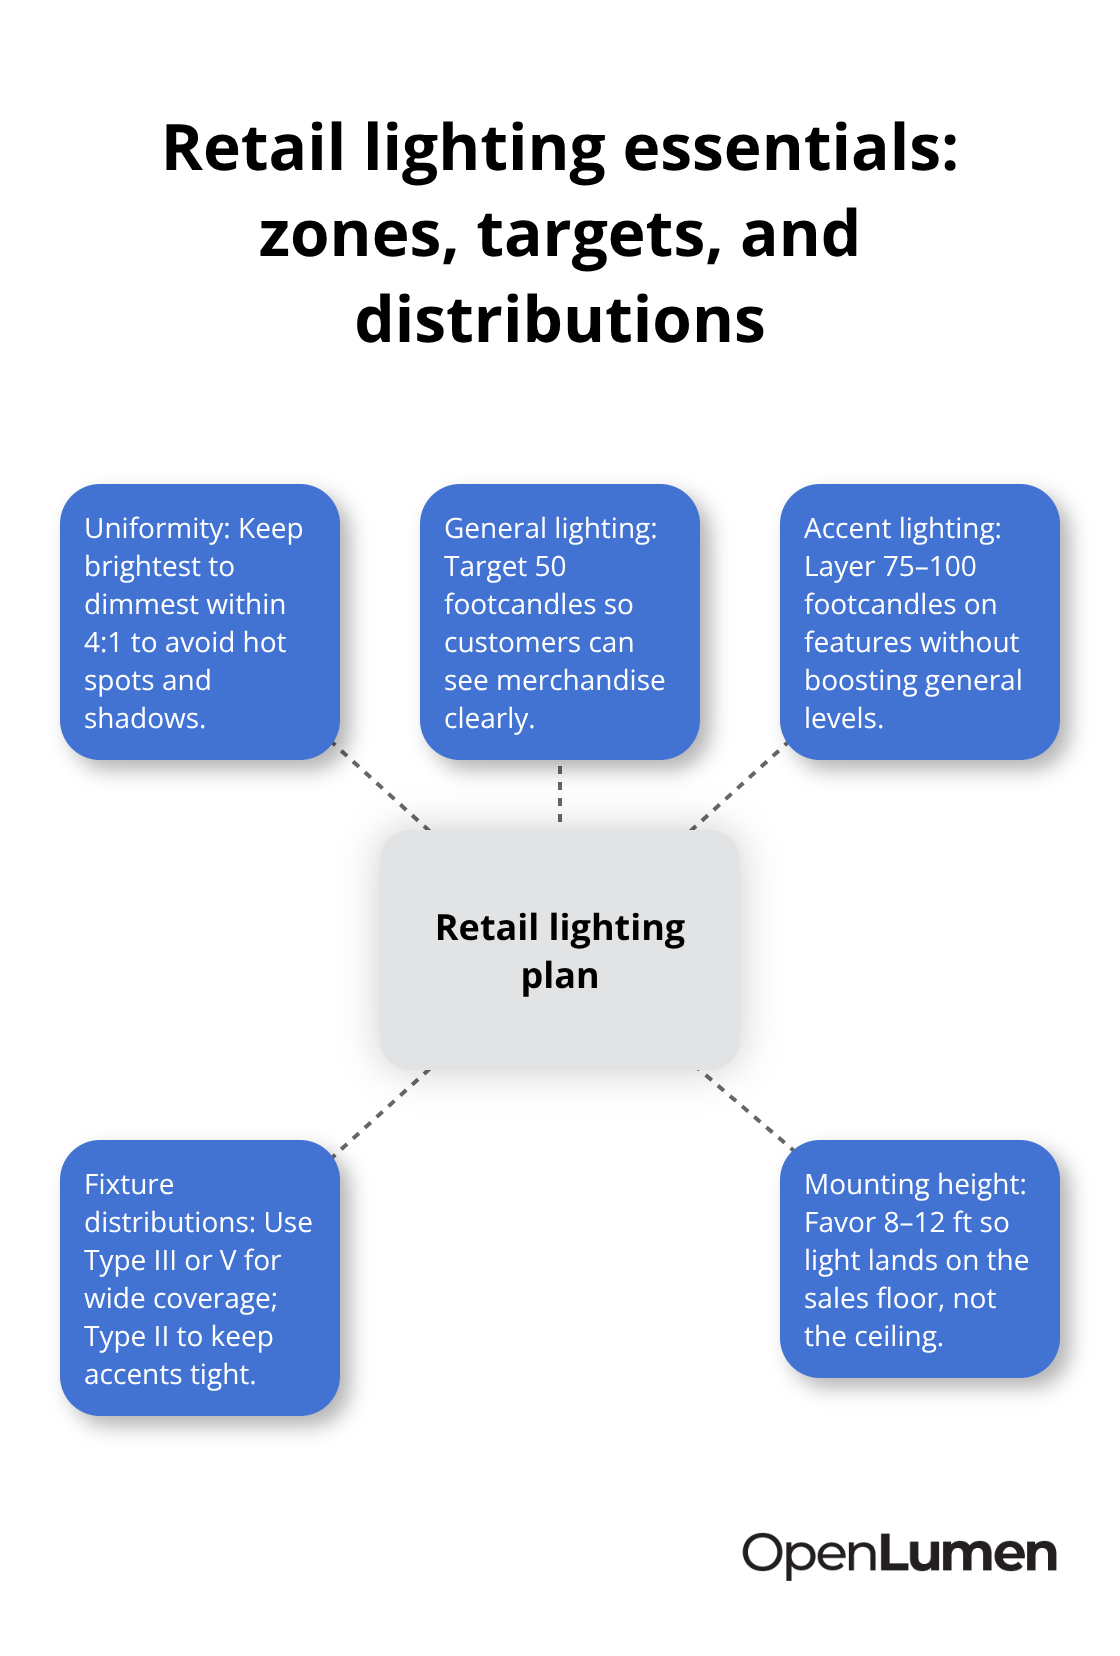
Retail spaces demand uniform light across the sales floor without dark patches that make products look bad or customers feel unsafe. Most retail layouts fail because designers treat the entire space as one zone and place fixtures in a grid without accounting for product displays, shelving heights, or customer traffic patterns. A target of 50 footcandles for general retail spaces matches industry standards and provides enough brightness for customers to see merchandise clearly. The key is spacing fixtures so that the brightest point and dimmest point stay within a 4:1 uniformity ratio-meaning your brightest spot is no more than four times brighter than your darkest spot. Anything wider than that creates obvious hot spots and shadows that damage the shopping experience.
Where Dark Spots Actually Hide
Dark zones in retail stores typically appear near walls, in corners where shelving meets the sales floor, and in areas between fixture rows. A photometric grid with 5-foot spacing reveals these problem areas instantly, showing you exactly where light intensity drops. Many retailers mount fixtures too high to save money on poles, but higher mounting spreads light over a wider area and reduces intensity at the merchandise level where customers actually look. Lower mounting heights between 8 and 12 feet work better for typical retail spaces because they concentrate light on the sales floor rather than the ceiling. If your store has high ceilings, you need more fixtures placed closer together to maintain uniform coverage at the product display height.
How Accent Lighting Changes the Game
General lighting and accent lighting serve different purposes and should never compete for the same fixture. General lighting creates the baseline brightness across the sales floor, while accent lighting highlights specific products, window displays, or promotional areas. Retailers often waste money by adding accent fixtures without reducing general lighting, which creates uncomfortable brightness contrasts. Instead, divide your retail space into zones: the main sales floor receives consistent general illumination at 50 footcandles, while feature displays or high-value merchandise areas receive additional accent lighting at 75 to 100 footcandles. This layering approach keeps energy costs reasonable while directing customer attention to products you want to emphasize. Use Type III or Type V fixture distributions for general coverage and narrower Type II distributions for accent work so accent light stays focused on the target area and doesn’t spill into adjacent zones.
Moving From Theory to Your Floor Plan
The next step moves beyond these retail principles into office spaces, where different challenges emerge. Meeting rooms and workstations require their own photometric approach because computer screens, glare control, and task-specific lighting demand precision that retail layouts don’t address.
Office Lighting That Stops Glare and Cuts Energy Waste
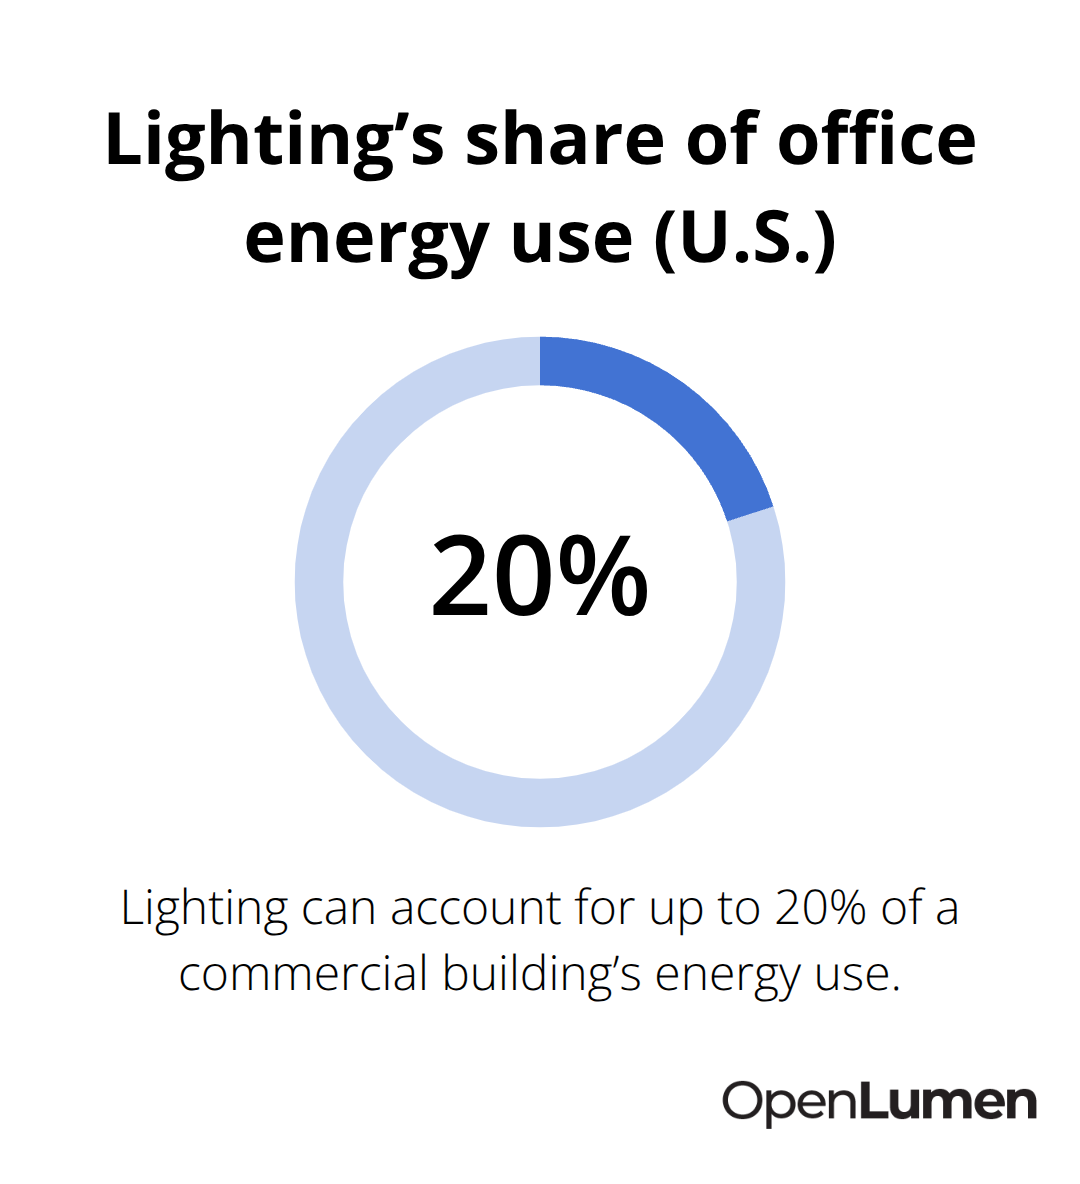
Office environments demand a completely different photometric approach than retail spaces because computer screens, task lighting, and employee comfort directly affect productivity. The U.S. Department of Energy reports that lighting accounts for up to 20 percent of a commercial building’s energy usage, which means poor office layouts waste thousands annually while simultaneously reducing worker output through glare and eye strain.
Meeting Rooms and Workspaces Need Different Strategies
A typical office workspace requires 30 to 50 footcandles on horizontal work surfaces, but the real challenge is preventing glare on monitors and screens rather than just hitting a brightness target. Most offices fail because they place fixtures directly above workstations or in line with screen sight lines, creating reflection and discomfort that forces employees to reposition monitors or adjust their posture in ways that cause neck and shoulder pain.
The solution is offsetting your fixture grid so that light sources sit to the side of workstation rows rather than directly above them. If your office uses a standard grid of desks running east-west, place your fixtures in a north-south pattern offset by at least 3 to 4 feet from the desk rows. This positioning delivers adequate illumination on work surfaces while keeping direct light out of employee sight lines.
Meeting rooms need higher uniformity than general office areas because people in meetings look in multiple directions and need consistent brightness everywhere in the room. Try 50 footcandles with a 3:1 uniformity ratio for meeting spaces, and avoid placing fixtures directly above the conference table where they create shadows on faces and documents during video calls.
Strategic Fixture Placement Multiplies Energy Savings
Energy efficiency in offices multiplies when you integrate lighting controls with your photometric layout rather than treating them as separate decisions. Daylight harvesting systems reduce fixture output automatically when natural light enters through windows, but only if your layout positions fixtures strategically to complement rather than compete with daylight.
Fixtures near windows should use narrower distributions to concentrate light on interior work areas, while fixtures in the building core can use wider distributions to cover larger zones with fewer units. A well-designed office layout typically uses 15 to 20 percent fewer fixtures than a standard grid approach while maintaining or exceeding uniformity targets.
Occupancy sensors paired with dimming controls cut energy consumption further by reducing output in unoccupied zones during lunch hours or after hours. Tunable LED fixtures that shift color temperature throughout the day support circadian rhythms and reduce eye strain, though they require proper spacing to deliver consistent color across the entire space.
Run Your Calculations Before You Buy Fixtures
The mistake most office projects make is specifying fixtures without photometric data, which means contractors install them in arbitrary patterns and hope the result works. Instead, run a calculation grid with 5-foot spacing before purchasing a single fixture.
This step takes 1 to 3 business days and costs far less than rewiring or replacing fixtures after installation reveals dark spots or glare problems. Your photometric study should specify exact mounting heights, fixture quantities, aiming angles if any, and the uniformity ratio achieved at the design plane, giving you confidence that the layout will actually perform when installed.
Warehouse and industrial facilities present an entirely different set of constraints-higher ceilings, larger open areas, and safety-critical visibility requirements that demand their own photometric approach.
Warehouse Lighting That Actually Delivers Safety and Efficiency
Warehouse and industrial spaces demand photometric layouts that prioritize safety and cost control over aesthetics. The challenge is that high ceilings and large open areas tempt facility managers to under-spec fixtures and spread them too far apart to save money, which inevitably creates dark zones where accidents happen and inventory gets damaged. OSHA and the National Council on Compensation Insurance both emphasize that inadequate lighting directly correlates with workplace injuries, slip-and-fall incidents, and reduced productivity.
Meeting the Minimum and Maintaining Uniformity
A warehouse aisle requires a minimum of 30 footcandles according to industry standards, but this baseline assumes even distribution. In reality, dark spots between fixtures become liability traps where forklift operators miss obstacles or workers fail to see hazards. The uniformity ratio for warehouses should never exceed 4:1, and 3:1 is far more reliable. This means your brightest point in an aisle cannot be more than three times brighter than your darkest point, which forces you to space fixtures closer together than you might initially think necessary.
High-bay fixtures mounted at 25 to 35 feet create a fundamentally different light distribution pattern than retail or office fixtures, so mounting height directly determines how many fixtures you actually need. A common mistake is calculating for a 35-foot mounting height during design, then installing fixtures at 25 feet, which creates overlapping light and wastes energy. Conversely, mounting higher than designed leaves dark gaps. The only way to know the correct spacing is to run a photometric grid with your actual mounting height locked in before ordering a single fixture.
Spacing and Distribution Patterns That Work
A 5-foot calculation grid reveals exactly where your uniformity ratio breaks down and shows you the minimum spacing that achieves your target. For a typical warehouse aisle 30 feet wide with 30-foot mounting height, Type V distribution fixtures spaced 40 feet apart on center deliver 30 footcandles with acceptable uniformity, but moving fixtures to 35-foot spacing drops intensity and creates visible dark zones between them. This is not theoretical-it shows up immediately in a photometric grid and determines whether your layout actually works.
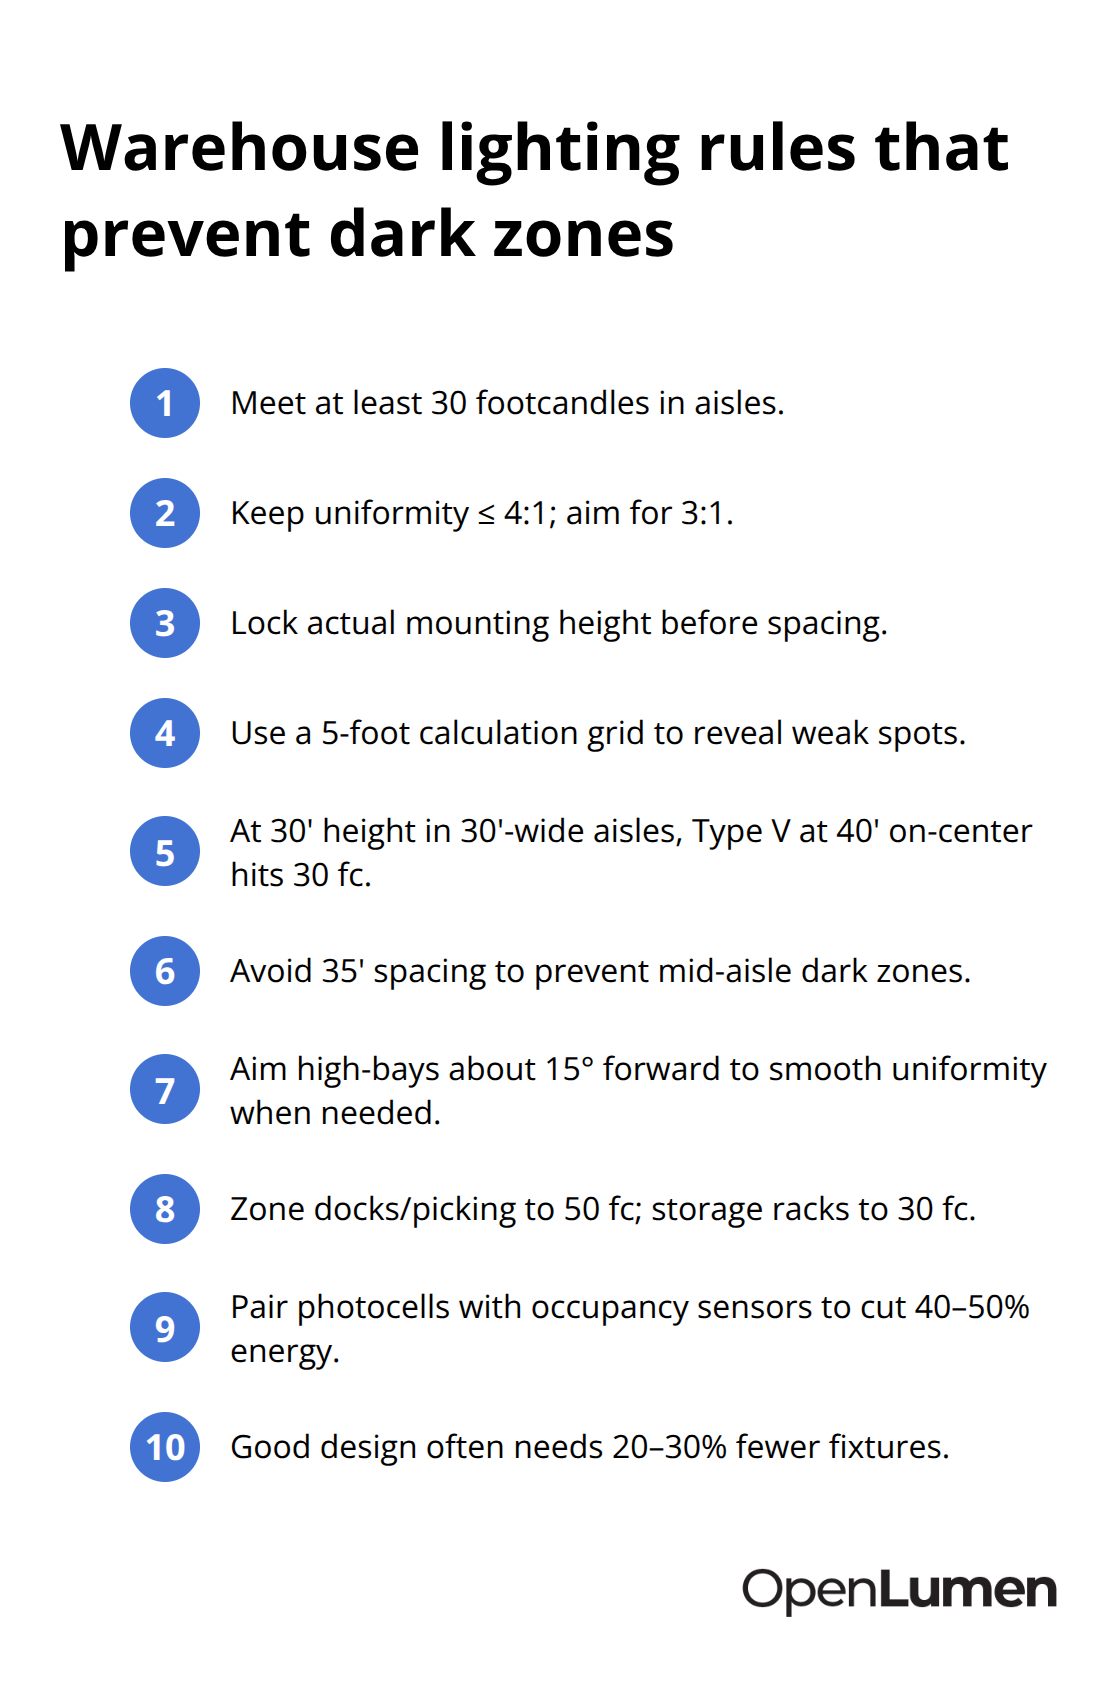
Aiming angles matter far more in warehouses than most designers realize because a fixture aimed slightly forward or back changes the intensity pattern dramatically. A high-bay fixture aimed straight down concentrates light directly beneath it, creating bright spots with dark gaps between. The same fixture aimed forward at a 15-degree angle spreads light more evenly across the floor and improves uniformity significantly. Your photometric study must specify aiming angles precisely because contractors cannot guess and expect good results.
Strategic Zoning Cuts Energy Without Sacrificing Safety
Energy costs in warehouses add up fast because the space runs continuously and covers thousands of square feet. Strategic fixture placement cuts energy consumption without sacrificing safety by concentrating light where people actually work. Dock areas and picking zones need 50 footcandles because workers read labels and scan barcodes, while storage racks in the back can operate at 30 footcandles. Dividing your warehouse into zones with different target illuminance levels means fewer total fixtures and lower utility bills.
Photocells paired with occupancy sensors cut warehouse energy consumption by 40 to 50 percent because you can reduce output automatically during low-activity hours or shut off lights in unused sections entirely. A well-designed warehouse layout typically uses 20 to 30 percent fewer fixtures than a basic grid while maintaining superior uniformity and safety performance. The payback period on proper photometric planning is usually 18 to 24 months through reduced energy costs alone, not counting the liability protection and productivity gains from eliminating dark zones.
Final Thoughts
The photometric layout examples you’ve seen across retail, office, and warehouse spaces serve as starting points you adapt to your actual building. A 50-footcandle retail layout works for a 12-foot ceiling with standard shelving, but your store might have 14-foot ceilings and different product displays that require fixture repositioning. The principles stay the same: maintain your uniformity ratio, account for mounting height, and run a calculation grid before installation.
Adapting these photometric layouts examples to your specific conditions means measuring your actual dimensions, identifying existing poles or mounting points, photographing the space, and documenting any special requirements like light trespass limits or dark-sky compliance. This information becomes the foundation for a photometric study that shows exactly how many fixtures you need, where they go, and what height they mount at. Without this validation step, you’re guessing-and guessing costs money through wasted fixtures, energy waste, or worse, dark zones that create safety problems.
Start with the layout example closest to your space type, adjust for your actual dimensions and mounting heights, and validate with a photometric grid. OpenLumen lets you create layouts, run real-time illuminance analysis, and generate professional reports without expensive software or steep learning curves. This approach eliminates guesswork and delivers lighting that performs from day one.
The information provided is for general educational purposes only and should not be considered professional engineering or lighting design advice. Always verify project requirements, local codes, and specifications with qualified professionals before making final decisions.


