
Poorly designed corridor lighting layouts waste energy and create safety hazards. Uneven illumination, dark spots, and fixture placement errors are common problems we see in hallway designs across commercial and residential properties.
At OpenLumen, we’ve helped countless teams fix these issues by applying proven design principles and photometric analysis. This guide walks you through the standards, mistakes to avoid, and practical steps to get corridor lighting right.
Why Corridor Lighting Really Matters
Corridor lighting is not a minor detail-it directly affects how safe people feel, how easily they navigate a space, and how much money a building wastes on electricity. Most corridors operate 12 to 16 hours daily, so poor lighting design compounds over time. Facilities often spend thousands on energy bills because their hallway fixtures are spaced haphazardly or set to brightness levels that far exceed actual needs.
Standards Give You a Target, Not a Suggestion
Building codes and lighting standards exist for a reason. The Illuminating Engineering Society recommends 100 to 200 lux for general corridor illumination, depending on corridor width and use. Residential hallways typically need around 100 lux, while commercial corridors with higher traffic density or security concerns may reach 150 to 200 lux. These numbers are not arbitrary-they reflect what the human eye needs to move safely without tripping hazards or navigation errors. Corridors below 75 lux force people to struggle with reading signage and identifying obstacles. Above 250 lux in a residential hallway, you waste 30 to 40 percent of your energy budget on unnecessary brightness. The Global Street Design Guide reinforces this principle for outdoor corridors: uniform illumination prevents the contrast shifts that strain vision and reduce perceived safety.
Uneven Light Creates Real Problems
A corridor with dark spots performs worse than one that is uniformly dim. The human eye constantly adjusts to brightness changes, which causes discomfort and actually makes people feel less safe. Corridors with 0.5 lux in one zone and 3 lux in another generate more user complaints than corridors uniformly lit at 1.5 lux. Wayfinding suffers too-if signage in one section is well-lit and another is shadowed, occupants second-guess their route. Try for a uniformity ratio of at least 0.7, meaning the minimum illuminance should be at least 70 percent of the average. This prevents the jarring transitions that make corridors feel uncomfortable or unsafe.
Energy Efficiency Starts with Right-Sizing
LED technology delivers 50,000 to 70,000 hours of lifespan and cuts energy consumption by 60 to 80 percent compared to incandescent or fluorescent fixtures. However, oversizing fixtures or spacing them too closely negates these gains. A 15-meter residential hallway lit with 3000K color temperature at 90 lumens per square meter uses roughly 60 percent less energy than the same hallway lit at 4000K with poorly positioned 150-lumen fixtures. The difference lies in fixture selection and placement, not technology alone.
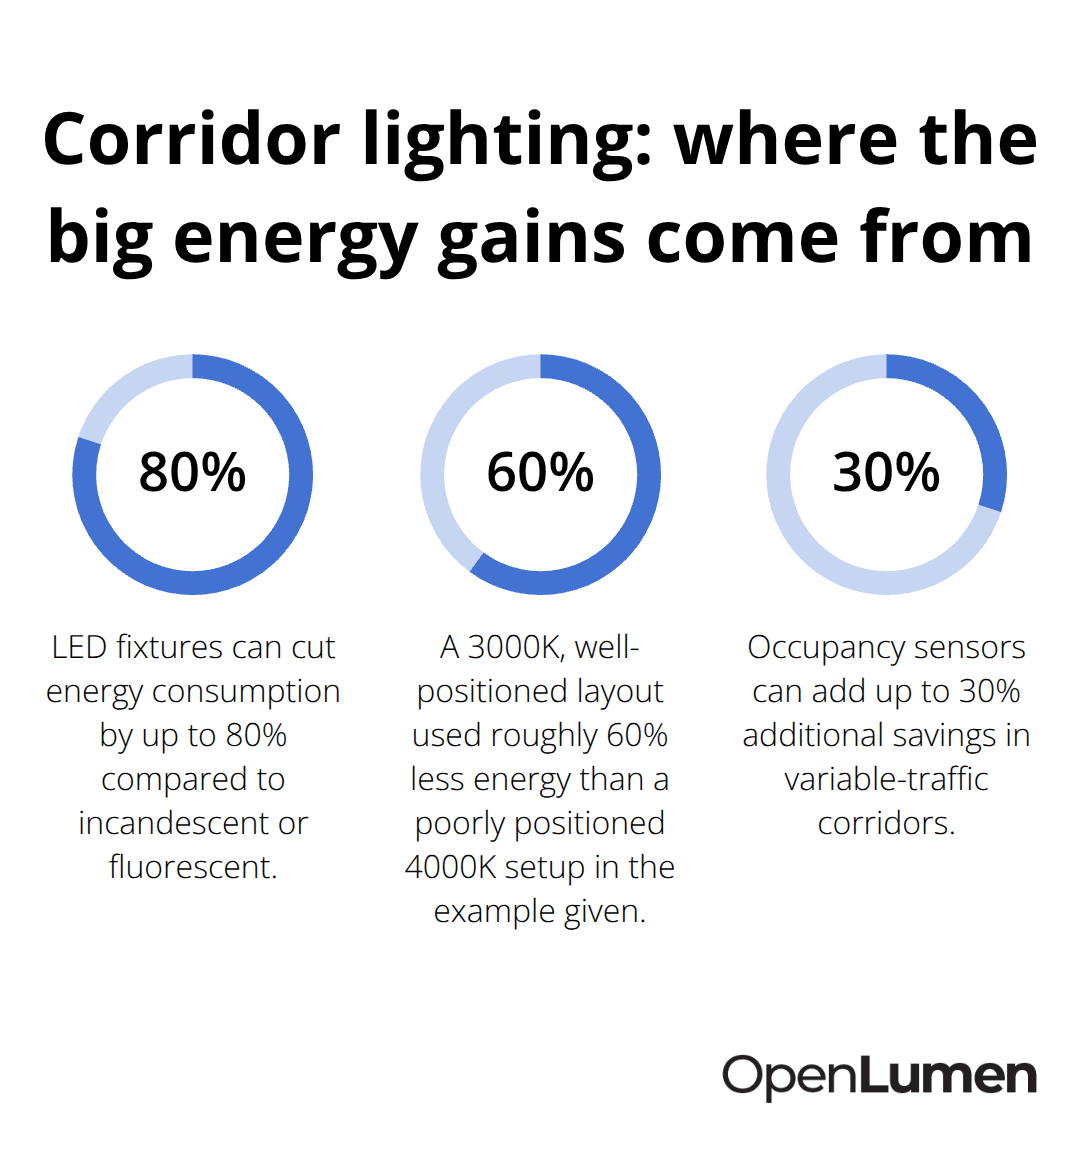
Occupancy sensors add another 20 to 30 percent savings in corridors with variable traffic patterns-motion sensors detect presence and dim or switch lights automatically (which is especially effective in commercial buildings where hallways empty during off-hours).
How Photometric Analysis Prevents Costly Mistakes
Before you install a single fixture, photometric analysis reveals whether your layout will actually meet illuminance standards and uniformity targets. This step separates successful projects from those that require expensive retrofits. Analysis tools show you exactly where dark spots will form, how much energy each configuration consumes, and whether your spacing decisions align with code requirements.
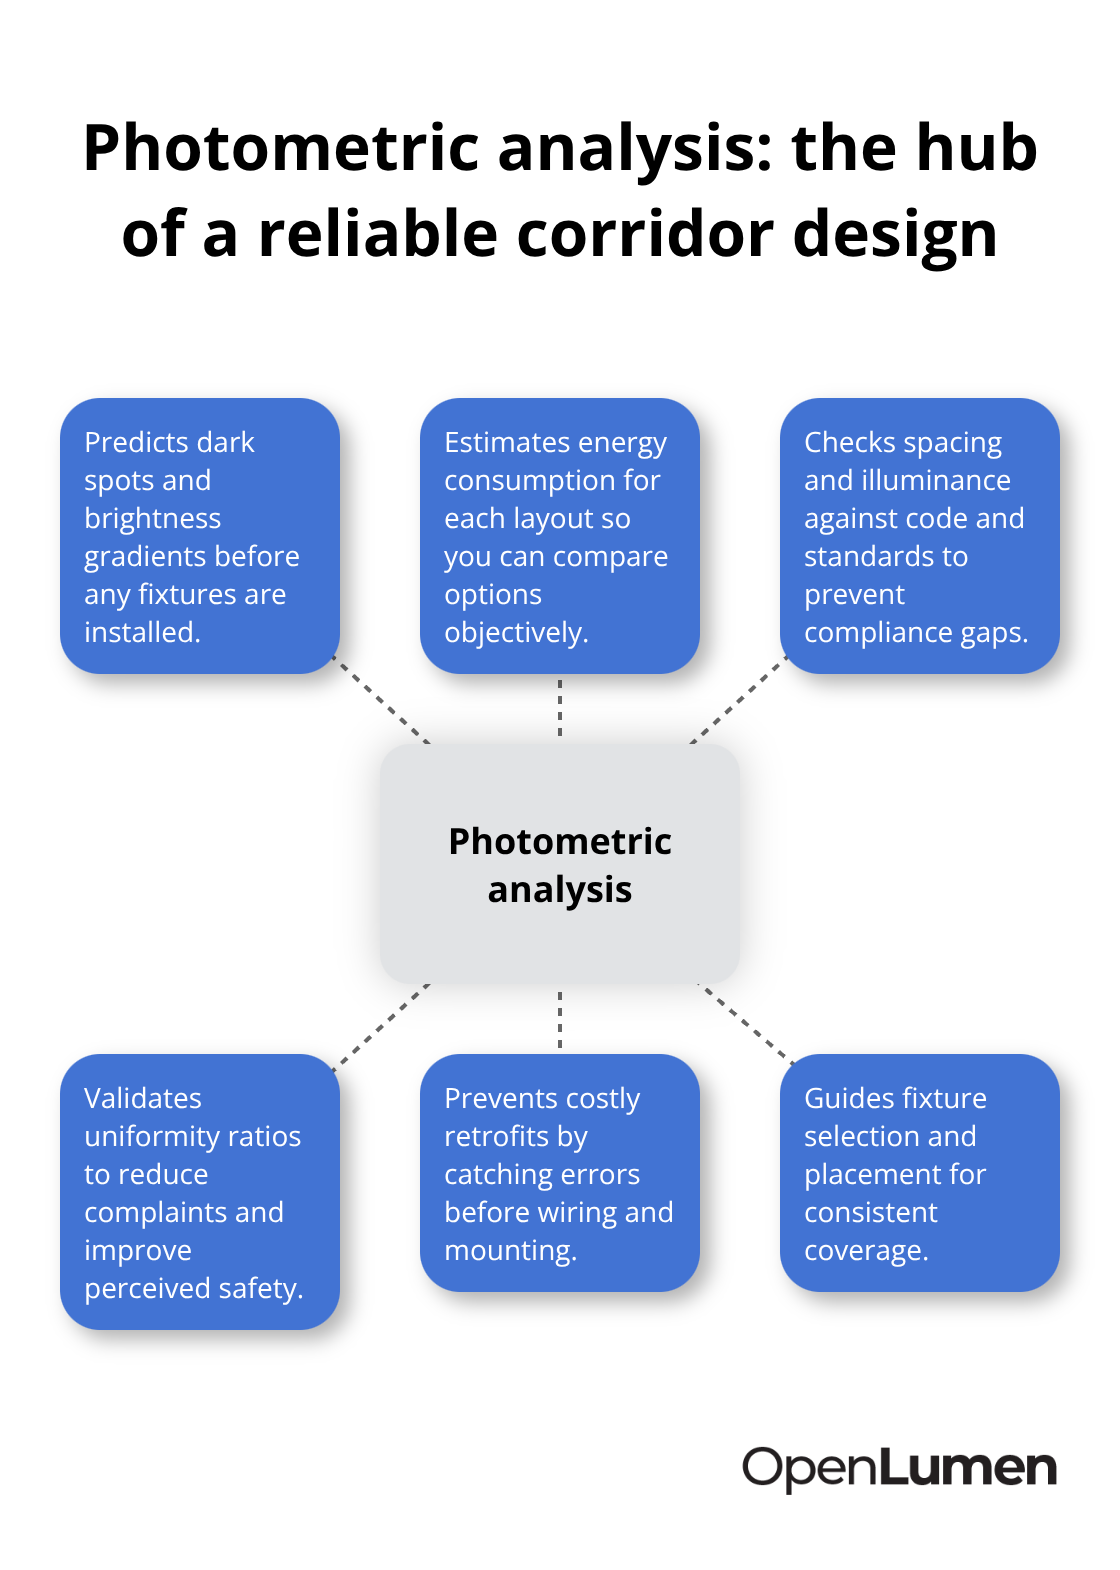
Teams that validate designs before installation avoid the common trap of discovering uneven light distribution after fixtures are mounted and wired.
Common Lighting Design Mistakes in Corridor Layouts
Spacing Errors Create Alternating Zones of Brightness and Shadow
Most corridor lighting failures stem from spacing fixtures without accounting for ceiling height or corridor width. A 12-meter hallway with 2.7-meter ceilings needs fixtures spaced roughly every 2.4 to 2.5 meters to maintain uniform illumination, yet many teams install them 3.5 to 4 meters apart and then discover dark patches form midway between fixtures. Fixture spacing should equal or slightly undercut the ceiling height as a rule of thumb, but many teams apply arbitrary distances like every 3 meters regardless of context. A 15-meter hallway with 2.4-meter ceilings requires at least 6 to 7 fixtures to hit uniformity targets, not 4 or 5. Photometric analysis catches these mistakes before installation-it shows exactly where light levels drop and where uniformity ratios fail.
Over-Lighting Wastes 30 to 40 Percent of Your Energy Budget
Teams often confuse brightness with safety and assume more light always means better visibility. A commercial corridor running at 250 to 300 lux wastes 30 to 40 percent of its energy budget compared to one optimized at 150 lux. In reality, a corridor uniformly lit at 120 lux feels safer and performs better than one with 150 lux in some zones and 60 lux in others. Occupancy sensors amplify this problem in empty hallways; if motion sensors trigger full brightness in a corridor that sits empty for hours, energy waste accelerates. Codes only require 100 to 200 lux, yet many installations far exceed these targets without any performance benefit.
Obstructions and Poor Fixture Placement Destroy Uniformity
Ignoring obstructions like ceiling vents, ductwork, or the corridor’s own geometry causes fixtures to cast unexpected shadows that destroy uniformity. Fixtures installed without checking sight lines or accounting for wall-mounted equipment often fail to deliver the intended light distribution. A fixture with a 90-degree beam angle throws light much differently than one with a 120-degree spread, yet both might be mounted at the same height without adjustment. These errors typically surface only after installation, when retrofitting becomes expensive and disruptive.
Validation Tools Prevent Costly Reinstalls
Teams that validate layouts with photometric analysis before ordering fixtures avoid the 60 to 80 percent energy penalties that poor design creates. Photometric tools show exactly where dark spots will form, how much energy each configuration consumes, and whether spacing decisions align with code requirements. This step separates successful projects from those that require expensive retrofits. The difference between a well-designed corridor and a poorly designed one often comes down to whether the team invested 30 minutes in photometric validation before installation began. Understanding how to calculate proper spacing and select the right fixtures transforms corridor lighting from guesswork into a predictable, efficient process.
How to Space Fixtures and Choose the Right Setup
Start with ceiling height and corridor width as your foundation-these two measurements determine everything else. A corridor with 2.7-meter ceilings needs fixtures spaced roughly 2.4 to 2.5 meters apart to maintain uniformity, while a 3.2-meter ceiling can handle spacing up to 3 meters without dark spots forming between fixtures. The Global Street Design Guide reinforces this principle for outdoor corridors: spacing should not exceed the light cone distance to avoid gaps.
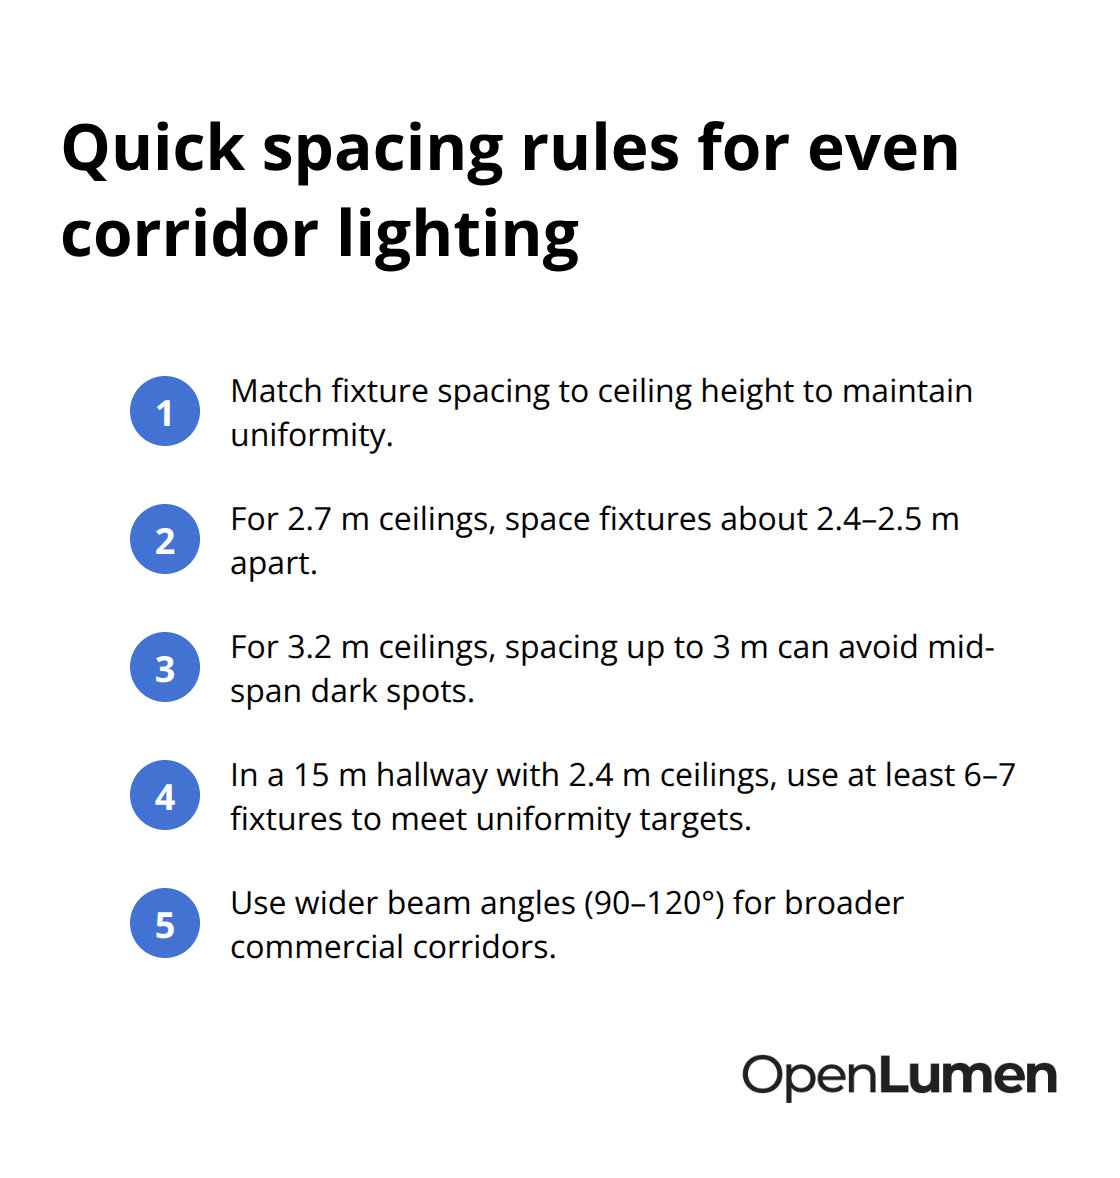
For a 15-meter hallway with 2.4-meter ceilings, you need at least 6 to 7 fixtures to hit uniformity targets of 0.7 or higher. Width matters too-narrow hallways benefit from slim-profile sconces or recessed linear LEDs that preserve perceived space, while wider commercial corridors need broader beam angles (90 to 120 degrees) to achieve even coverage across the full floor.
Match Lumen Output to Your Target Illuminance
Lumen output must match your target illuminance: try for 100 to 200 lux depending on corridor use, which typically means 150 to 300 lumens per square meter delivered to the floor. A residential hallway at 100 lux needs far fewer lumens than a commercial corridor at 200 lux, yet many teams oversupply fixtures and waste 30 to 40 percent of their energy budget. LED fixtures deliver 50,000 to 70,000 hours of lifespan, cutting energy consumption by 60 to 80 percent compared to incandescent or fluorescent alternatives, but only if you right-size the output for your actual illuminance targets rather than assuming more light equals better design.
Select Color Temperature and CRI for Comfort
Color temperature affects how safe and welcoming a corridor feels-3000K creates a warm residential vibe without the clinical harshness of 4000K, while 5000K is rarely justified unless clarity for high-stakes security tasks demands it. Choose a Color Rendering Index (CRI) of 80 or higher so colors and signage appear natural and inviting. This combination ensures occupants feel comfortable moving through the space without experiencing the visual strain that poor color rendering creates.
Validate Every Layout Before Installation
Photometric analysis separates corridors that meet code from those that fail uniformity, create dark spots, or waste thousands on unnecessary energy. Analysis tools show exactly where illuminance drops, whether your spacing decisions align with standards, and how much energy each configuration consumes. A 15-meter hallway upgraded to 3000K LED with dimmable drivers and motion sensors can achieve roughly 60 percent energy reduction compared to poorly positioned fluorescent fixtures, yet only if the layout itself is sound. Occupancy sensors amplify savings in corridors with variable traffic by automatically dimming or switching lights in empty spaces, adding another 20 to 30 percent efficiency gain in commercial buildings.
Run Photometric Software Before You Order Fixtures
Spend 30 minutes validating your design with photometric software before you order fixtures or schedule installation-this step catches spacing errors, obstructions, and beam angle mismatches that would otherwise force costly retrofits after installation. Tools like OpenLumen let you upload luminaire specifications, model your corridor dimensions, and run real-time illuminance analysis without expensive licensing or steep learning curves. This approach lets teams validate layouts before ordering fixtures and avoid the common trap of discovering uneven light distribution only after wiring and mounting are complete.
Final Thoughts
Corridor lighting layouts succeed when you anchor decisions in three fundamentals: spacing that matches ceiling height, fixture selection that delivers the right lumen output, and validation before installation. Teams that skip photometric analysis discover problems after wiring is complete, forcing expensive retrofits that could have been prevented with 30 minutes of upfront planning. The difference between a corridor that wastes 30 to 40 percent of its energy budget and one that operates efficiently comes down to whether you validated the design before ordering fixtures.
Digital tools have transformed corridor lighting from guesswork into a predictable process. You upload your corridor dimensions, select luminaires from a community-verified library, and run real-time illuminance analysis without expensive software licenses or steep learning curves. You see exactly where dark spots form, whether your spacing meets uniformity targets, and how much energy your layout consumes-all before installation begins.
Start by measuring your ceiling height and corridor width, then use photometric software to test spacing options and fixture types. Visit OpenLumen to model your corridor layout, validate your spacing decisions, and generate a professional report that documents your design choices. This single step separates corridors that meet code from those that fail, waste energy, or require costly retrofits.
The information provided is for general educational purposes only and should not be considered professional engineering or lighting design advice. Always verify project requirements, local codes, and specifications with qualified professionals before making final decisions.


