
Most lighting layouts fail because they’re designed without a clear system. Rooms end up with dark corners, wasted energy, and fixtures that create glare instead of comfort.
At OpenLumen, we’ve seen how the right lighting layout design principles transform spaces. This guide covers the core practices that actually work-from spacing fixtures correctly to avoiding the mistakes that waste money and create poor visibility.
How Light Spreads Across a Room
Understanding Light Distribution Patterns
Light doesn’t spread evenly on its own. A single fixture creates a bright zone directly below it and dark corners everywhere else. This is why most rooms feel poorly lit despite having plenty of fixtures-the light distribution is unbalanced. Understanding how light travels and where it lands is the first step to designing layouts that actually work.
Light spreads in patterns determined by fixture type, beam angle, and mounting height. A narrow beam concentrates light in a tight circle; a wide beam spreads it across a larger area but at lower intensity. According to GE Lighting, accent lighting should be about three times brighter than ambient light to create visual contrast, which means you can’t rely on one fixture type to handle all three lighting layers. Recessed downlights deliver broad, even illumination across horizontal surfaces when spaced correctly, making them ideal for ambient lighting foundations. Track lighting and spotlights offer directional control, letting you aim light exactly where tasks happen or where you want to highlight features. The key is matching fixture beam angles to room size and ceiling height-a 45-degree beam works differently in a 9-foot residential kitchen than in a 12-foot commercial space.
Spacing Fixtures for Even Illumination
Achieving even illumination requires spacing fixtures so their light zones overlap slightly without creating hotspots. For ambient downlighting, the rule is straightforward: divide ceiling height by 1.5 to find the maximum distance between fixtures. A 9-foot ceiling means fixtures should be no more than 6 feet apart; a 12-foot ceiling allows 8 feet. This prevents the dark patches that appear when fixtures are too far apart.
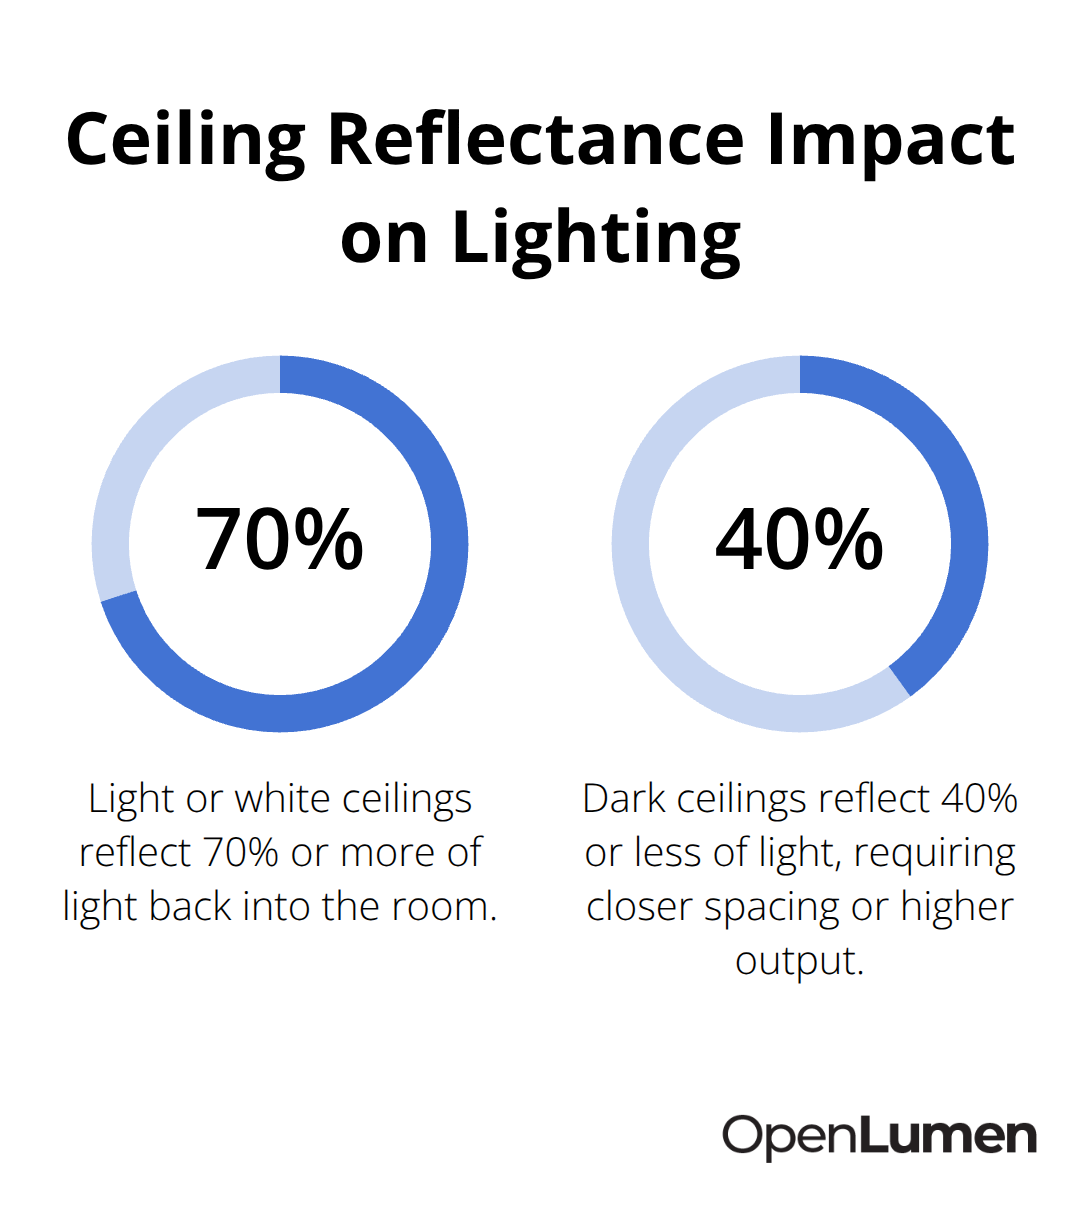
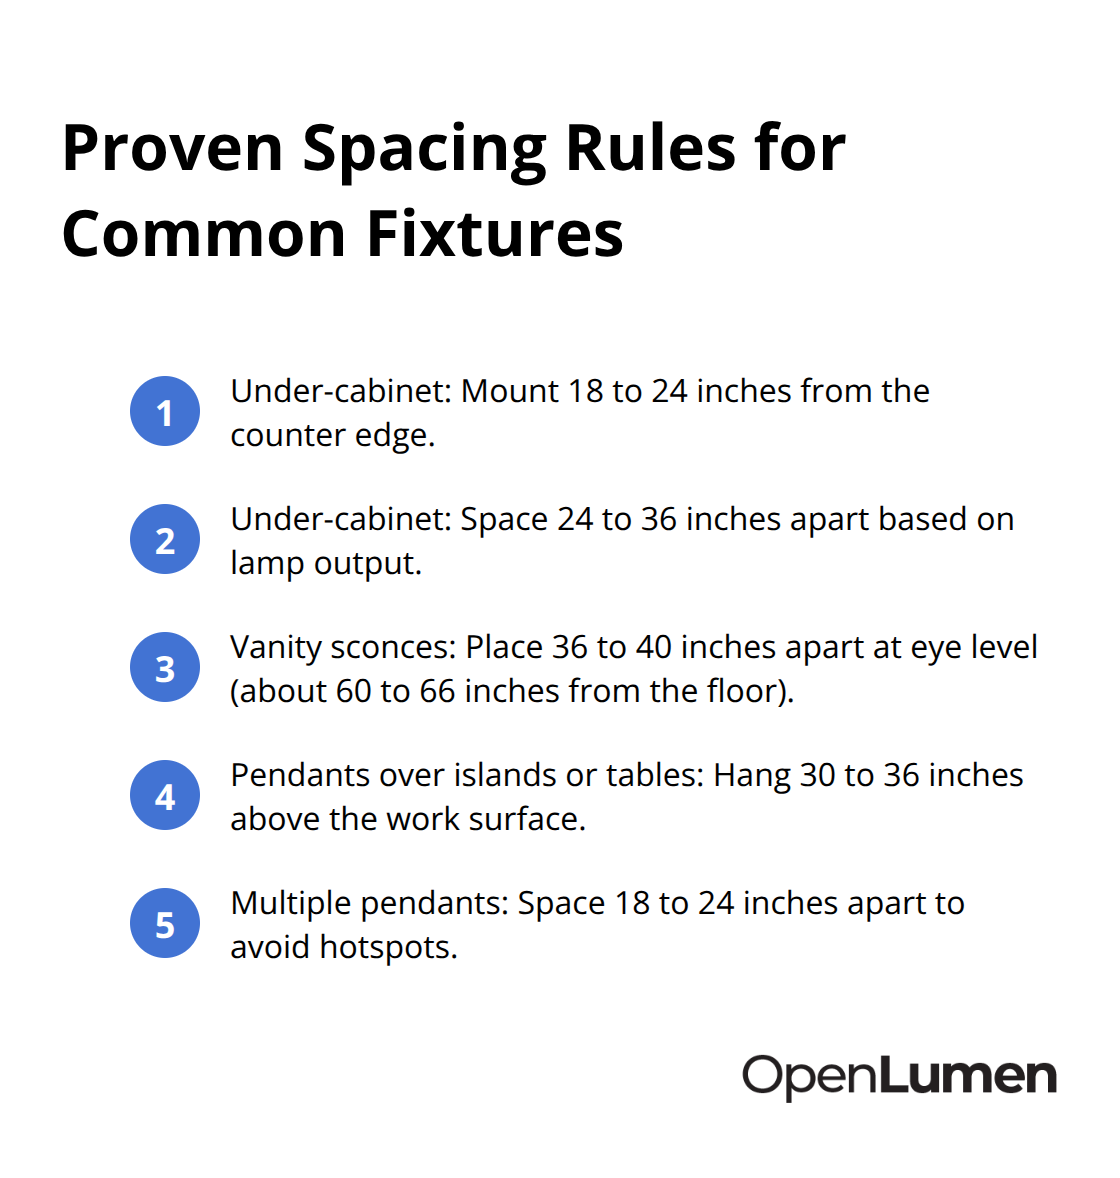
Ceiling reflectance matters significantly-a white ceiling bounces 80% of light back into the room, while a dark ceiling absorbs it, forcing you to space fixtures closer together or use higher-output lamps. Task lighting needs a different approach because it concentrates brightness on work surfaces rather than spreading it evenly. Under-cabinet kitchen lighting, for example, should eliminate shadows on countertops by positioning fixtures 18 to 24 inches from the edge of the counter and spacing them 24 to 36 inches apart depending on lamp output. Vanity lighting around bathroom mirrors works best with sconces positioned 36 to 40 inches apart at eye level to prevent shadows on the face.
Balancing Layers to Control Energy Use
The goal with task lighting isn’t uniform distribution across the room-it’s adequate brightness exactly where people need it. Balancing these layers prevents the common problem of over-lit spaces with wasted energy. Too many ambient fixtures running at full brightness all day drains energy budgets.
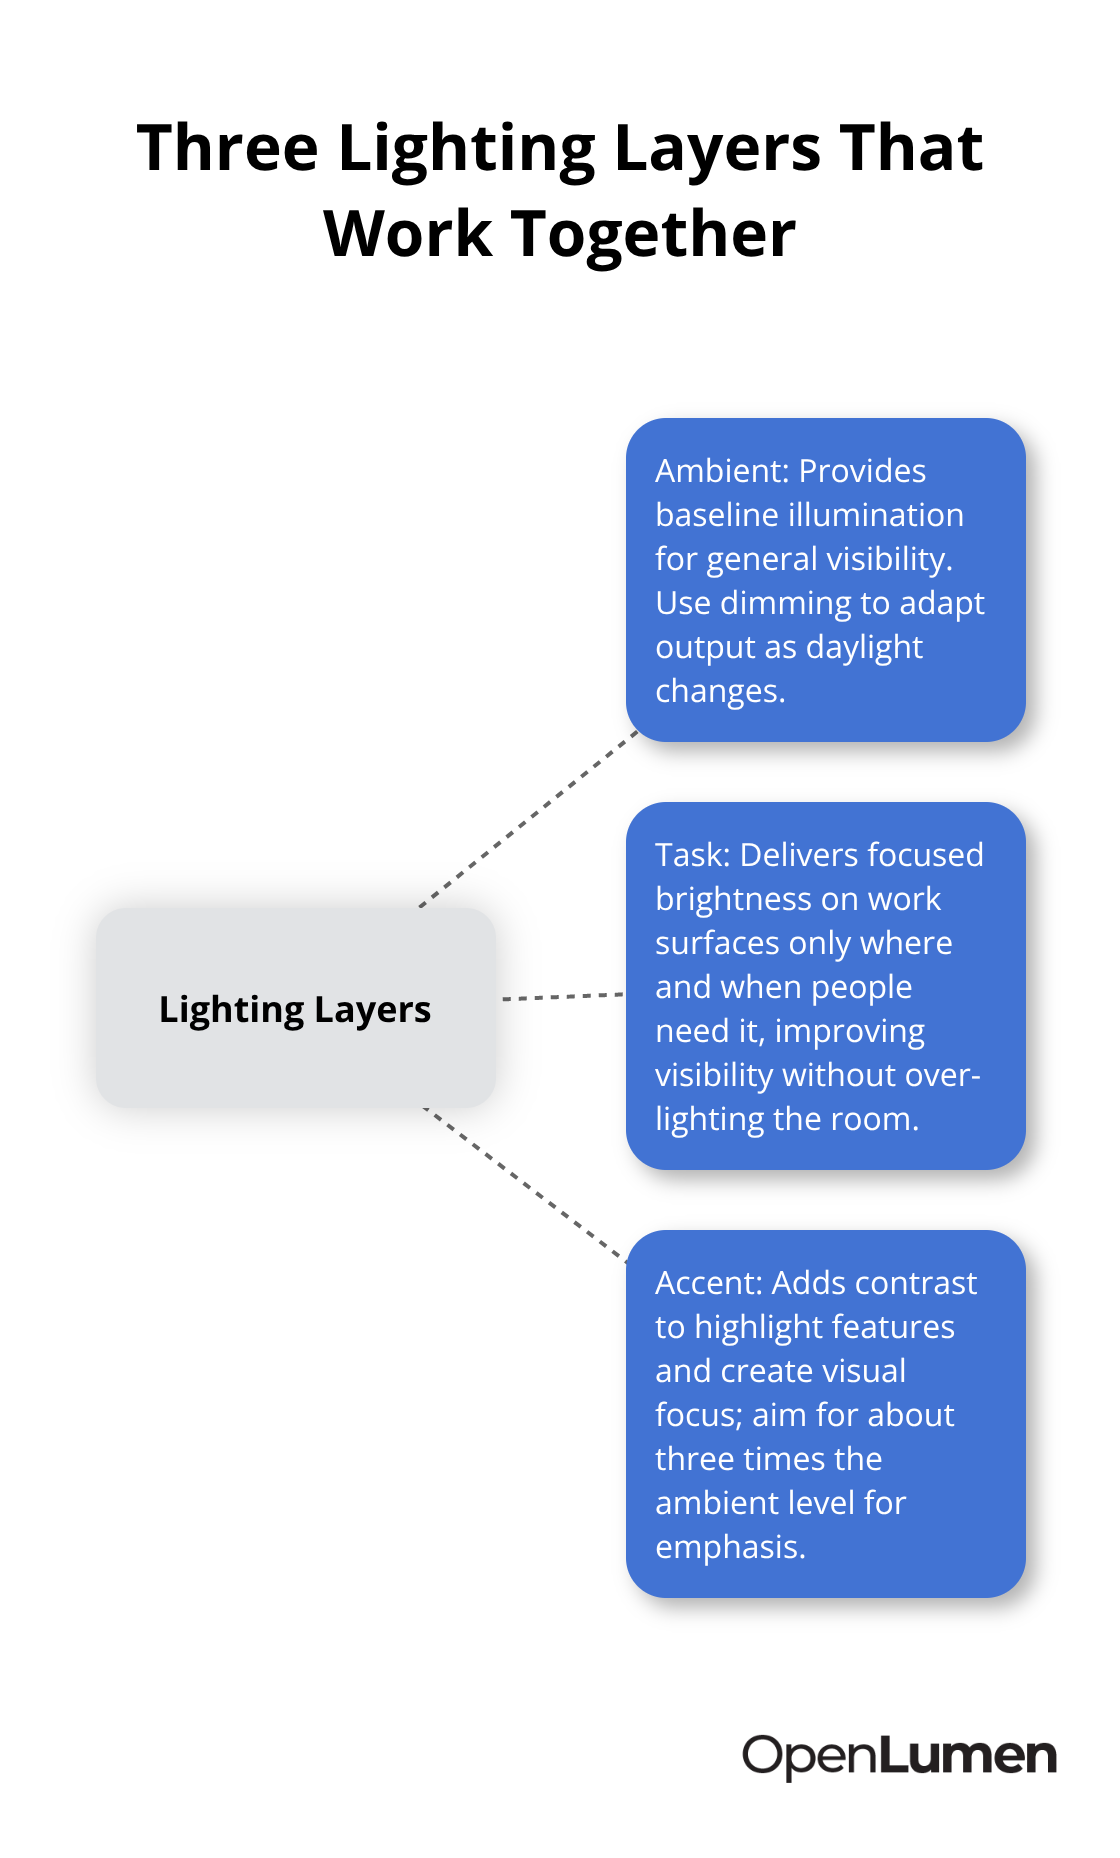
Instead, design ambient lighting to provide comfortable baseline brightness during daylight hours, then rely on dimming to adjust as natural light fades.
Task and accent layers activate only when needed, keeping overall energy consumption reasonable while maintaining visibility for specific activities. This layered approach also sets you up to handle the next critical challenge: placing fixtures strategically so they serve multiple purposes without creating the mistakes that plague most installations.
Strategic Fixture Placement and Spacing
Applying the 1.5 Rule to Real Conditions
The 1.5 ceiling height rule provides your foundation for ambient lighting, but it only works when you account for the specific fixtures and room conditions you’re actually installing. For a 9-foot ceiling with standard recessed downlights, spacing them 6 feet apart prevents dark gaps-but this assumes white or light-colored ceilings that reflect 70% or more of light back into the room. Dark ceilings (gray, charcoal, or wood beams) reflect only 40% or less, which forces you to reduce spacing to 4.5 or 5 feet to maintain the same uniformity.
Contractors often apply the 1.5 rule mechanically without checking actual ceiling material, then wonder why the finished space feels darker than expected. This oversight costs money and damages client satisfaction.
Task Lighting Spacing for Work Surfaces
Task lighting spacing depends entirely on the work surface and output of your fixtures. Under-cabinet kitchen lighting needs fixtures positioned 18 to 24 inches from the counter edge and spaced 24 to 36 inches apart-closer spacing for lower-output LEDs, wider spacing for high-output options. Vanity lighting works best with sconces placed 36 to 40 inches apart at eye level, roughly 60 to 66 inches from the floor, because this height prevents harsh shadows on the face during grooming. Pendant lights over kitchen islands or dining tables should hang 30 to 36 inches above the work surface, and multiple pendants need spacing of 18 to 24 inches apart for balanced illumination without hotspots.
Adapting Layouts for Room Shape and Ceiling Height
Room shape and ceiling height demand layout adjustments that most designers overlook. Rectangular rooms benefit from a grid pattern of fixtures aligned with the room’s length and width, while oddly shaped spaces (L-shaped kitchens, angled ceilings, alcoves) require you to map activity zones first, then position fixtures to serve those zones rather than spreading them uniformly. A vaulted or cathedral ceiling changes everything: fixtures mounted higher create wider light spread, so you can space them farther apart, but beam angle becomes critical because narrow beams waste light on unoccupied areas. In commercial spaces with 14-foot ceilings, spacing fixtures 10 to 12 feet apart works for general ambient lighting, but you must pair this with task lighting directly over workstations to prevent the dim, uncomfortable feeling that comes from relying solely on distant overhead fixtures.
Accounting for Wall and Floor Reflectance
Reflectance of walls and floors shifts the spacing calculation significantly. Light-colored walls bounce light around the room, extending effective coverage, while dark walls absorb it. You need to calculate actual illuminance requirements for your specific space using photometric data from manufacturers rather than guessing. OpenLumen lets you input fixture type, mounting height, spacing, and room dimensions to run real-time illuminance analysis, showing you exactly where dark spots appear before installation begins. This removes the guesswork and prevents costly on-site adjustments after fixtures are already mounted.
With spacing rules and room conditions locked in, the next challenge emerges: recognizing and avoiding the design mistakes that undermine even well-intentioned layouts.
Common Design Mistakes and How to Avoid Them
Over-Lighting Wastes Energy and Money
Most contractors and designers make the same three errors repeatedly, and each one costs money or creates client complaints. The first mistake is over-lighting spaces without considering actual illuminance requirements or daylight contribution. According to Energy.gov, LED upgrades save substantial energy compared to incandescent or fluorescent options, but only if you size fixtures correctly in the first place.
A kitchen with 500 lux of ambient lighting from recessed downlights plus another 500 lux from under-cabinet task lighting hits 1,000 lux on work surfaces-adequate for food prep. Adding a fourth row of recessed lights pushes ambient to 750 lux, creating harsh shadows and wasting 30 to 40 percent of energy on illumination nobody needs. The fix is straightforward: calculate illuminance requirements per room type before selecting fixtures. Kitchens and home offices need 300 to 500 lux of ambient light; living rooms and bedrooms work fine at 150 to 300 lux.
Once you know your target, use photometric data from manufacturers to determine how many fixtures actually deliver that level at your ceiling height. This prevents the expensive mistake of installing too many fixtures, then dimming them constantly because the space feels overlit.
Task-Specific Lighting Solves Visibility Problems
The second mistake is neglecting task-specific lighting because designers treat the entire room as one uniform space. Task lighting isn’t optional-it’s the difference between a functional kitchen and one where cooks struggle with shadows on countertops. Under-cabinet fixtures positioned 18 to 24 inches from the counter edge and spaced 24 to 36 inches apart eliminate shadows that ambient lighting alone cannot solve.
Vanity lighting with sconces placed 36 to 40 inches apart at eye level prevents the unflattering shadows that single overhead bathroom fixtures create. Pendant lights hanging 30 to 36 inches above kitchen islands provide focused brightness for dining and prep work. Without these task layers, ambient lighting must work harder, consuming more energy while delivering worse visibility.
Testing Fixtures Prevents Installation Errors
The third mistake is ignoring glare and shadow problems that appear only after installation. Recessed downlights create harsh shadows under cabinets or on faces when positioned too far from work surfaces. Narrow-beam accent lights mounted too close to walls create hotspots instead of even highlighting.
The solution is testing fixtures in actual conditions before committing to a full installation. Install one sample downlight at your planned height and spacing, then measure illuminance on horizontal surfaces and check for shadows. This single step catches placement errors that spreadsheets and calculations miss, preventing costly reinstallation after the job is complete.
Final Thoughts
Effective lighting layout design principles rest on three fundamentals: spacing fixtures correctly based on ceiling height and room conditions, matching fixture types to the specific tasks and zones they serve, and testing installations before committing to full deployment. These aren’t theoretical guidelines-they’re practical rules that prevent dark corners, wasted energy, and client dissatisfaction. The real-world application starts with calculation, not guessing.
You divide ceiling height by 1.5 to find ambient fixture spacing, adjust for ceiling reflectance, then layer task lighting directly over work surfaces where shadows matter most. A kitchen with properly spaced under-cabinet fixtures and ambient downlights delivers visibility that single overhead fixtures cannot match. A bathroom with sconces positioned at eye level eliminates the unflattering shadows that make grooming difficult. These aren’t luxuries-they’re the baseline for functional spaces.
Photometric information from manufacturers tells you exactly how much light reaches each surface at your planned mounting height and spacing. Testing one fixture in actual conditions before installing dozens catches placement errors that spreadsheets miss. This approach removes guesswork and protects your reputation, and OpenLumen streamlines the entire process by letting you input fixture specifications, room dimensions, and mounting heights to run real-time illuminance analysis before installation begins.
The information provided is for general educational purposes only and should not be considered professional engineering or lighting design advice. Always verify project requirements, local codes, and specifications with qualified professionals before making final decisions.


