
Lighting design mistakes cost contractors and property owners thousands in rework, delays, and wasted materials. Most errors stem from skipping analysis, ignoring site conditions, or selecting luminaires without proper data.
At OpenLumen, we’ve seen how the right planning prevents these costly failures. This guide shows you exactly what to avoid and how to validate your designs before installation.
Site Conditions Shape Every Design Decision
Most lighting failures happen before installation begins. Contractors and designers skip the critical step of analyzing what the space actually offers, then blame the design when results disappoint. Natural light availability, climate exposure, and existing architecture aren’t obstacles to work around-they’re the foundation of every successful layout.
How Daylight and Location Transform Your Lighting Needs
A south-facing office in Phoenix receives vastly different daylight than a north-facing warehouse in Seattle, yet both need the same illuminance at task surfaces. Ignoring this reality means oversizing artificial lighting in one space and undersizing it in another. Daylight availability directly impacts how much artificial lighting you actually need. A space flooded with north light at 500 lux during business hours requires less ambient fixture power than an interior room with no windows.
Most teams calculate illuminance as if artificial light alone must hit target levels all day. Instead, overlay your photometric layout against typical daylight conditions for your location and season. In temperate climates, north-facing spaces stay relatively consistent year-round, while south-facing areas swing dramatically between seasons. The National Renewable Energy Laboratory publishes hourly solar radiation data by location, which shows exactly when and how much daylight enters different orientations. Use this data to size fixtures that complement natural light rather than compete with it.
Climate Demands Specific Materials and Specifications
Climate matters equally to daylight. High-humidity coastal areas accelerate corrosion on outdoor fixtures and demand sealed or stainless-steel housings, while desert heat stresses LED drivers and requires thermal management specs most designers never check. Coastal and humid environments demand fixtures rated for salt-air corrosion (NEMA 6P or IP67 minimum) and stainless-steel hardware. Desert heat requires LED drivers with extended thermal ratings and fixtures designed for airflow. Cold climates need fixtures rated for low-temperature ballast operation and materials that won’t become brittle.
Skipping these details means fixtures fail prematurely, creating emergency maintenance calls and unexpected replacement costs. The upfront effort to specify climate-appropriate materials pays back within the first two years through reduced failures and service visits.
Existing Architecture Determines Fixture Placement and Performance
Existing architecture determines where you can mount fixtures without structural work, how ceiling height affects beam angles, and whether reflectance from walls and finishes will help or hinder your layout. A warehouse with dark concrete floors needs more lumens per fixture than one with light-colored epoxy. A retail space with exposed ductwork requires different positioning than one with a clean suspended ceiling.
High ceilings require different beam angles and spacing than low ceilings to avoid dark spots and glare. Columns, beams, and HVAC runs force you to shift fixture positions, which changes illuminance distribution across work surfaces. Measure actual obstructions during the site visit-don’t rely on architectural drawings, which often omit real-world additions.
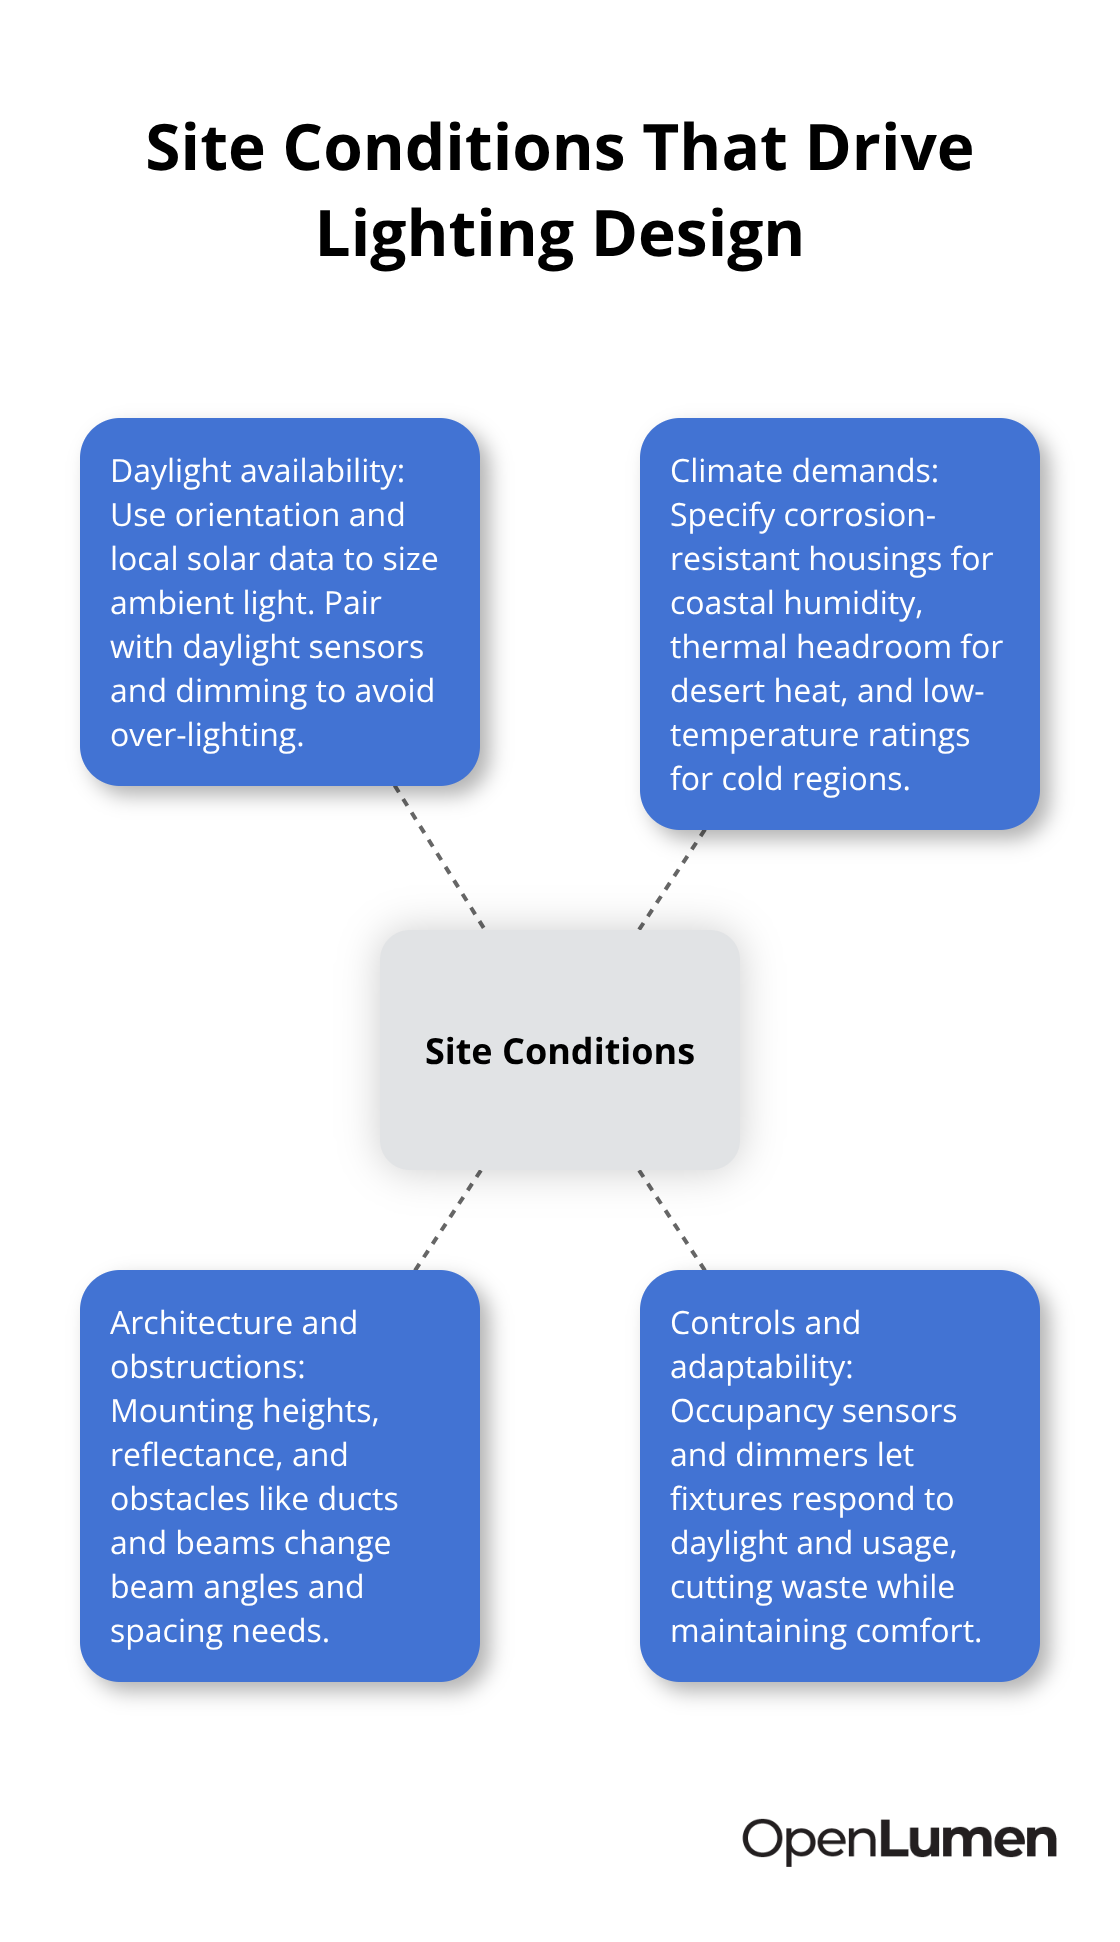
The ASHRAE/IES guidelines recommend starting every project with a site survey that documents ceiling height, wall and floor reflectance values, window locations and orientation, and existing obstructions. This takes 30 minutes and prevents rework that costs thousands. Dimmers and occupancy sensors become essential when daylight varies-they allow fixtures to dim as exterior brightness increases, cutting energy waste without sacrificing comfort. A properly integrated design means your lighting system adapts to conditions rather than running at full capacity regardless of what the sun provides.
These site-specific details form the baseline for your entire design. Without them, even the best luminaire selection fails to perform as intended. The next section shows you which design errors destroy projects even when site conditions are understood.
What Kills Projects: Choosing the Wrong Fixtures and Skipping Analysis
Photometric Data Separates Real Fixtures from Guesswork
Contractors and designers routinely specify luminaires based on aesthetics, price, or vague promises from suppliers-then watch illuminance fall short at task surfaces. The culprit is always the same: no photometric data was reviewed before ordering. Photometric data tells you exactly how a fixture distributes light, how many lumens reach specific distances and angles, and whether it actually meets your project requirements. Without it, you’re guessing.
A fixture rated 5000 lumens doesn’t guarantee usable light at a workstation 15 feet away if the beam angle is too wide or the candela distribution is poor. The ASHRAE/IES Lighting Handbook specifies that every luminaire selection must include polar charts, zonal lumen data, and beam angle specifications-not marketing brochures. Skipping this step costs projects thousands in rework when fixtures arrive and fail to hit target illuminance levels.
Worse, emergency ordering of replacement fixtures creates delays that compress timelines and inflate labor costs. Teams waste weeks waiting for substitute luminaires after discovering mid-installation that specified fixtures couldn’t deliver the required footcandles at task height. The solution is simple: before you add any fixture to a specification, download its photometric data sheet and verify the polar chart against your required illuminance at the actual mounting height and distance from work surfaces. If the data isn’t available from the manufacturer, reject the fixture and move on.
Undersizing and Oversizing Both Destroy Your Bottom Line
Underestimating illuminance levels means workers strain to see, productivity drops, and safety risks increase-forcing costly retrofits months after installation. Overestimating wastes 30 to 50 percent of energy and creates glare that reduces visibility, causes eye fatigue, and generates complaints from occupants.
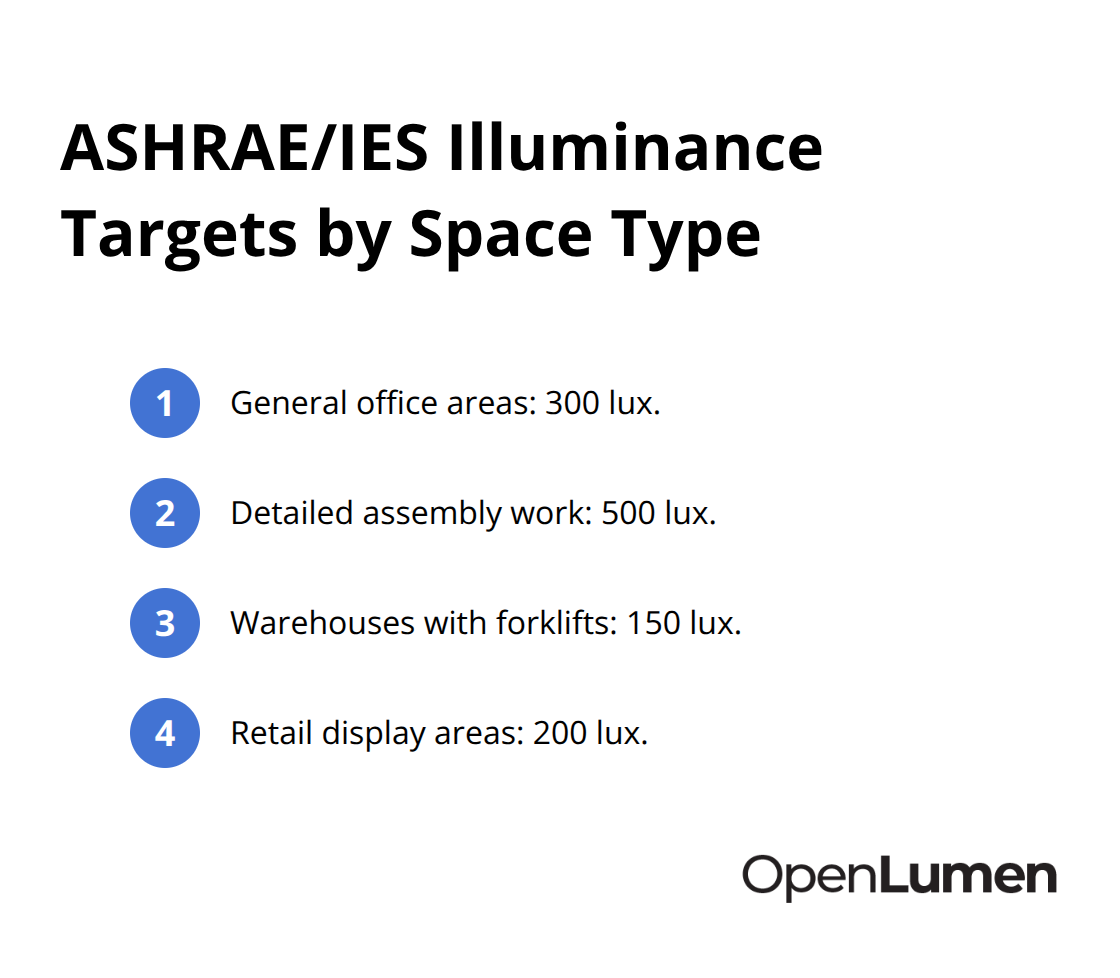
The ASHRAE/IES guidelines provide specific illuminance targets for every space type: 300 lux for general office areas, 500 lux for detailed assembly work, 150 lux for warehouses with forklifts, 200 lux for retail display areas. These aren’t suggestions-they reflect decades of research on human performance and safety. Yet most teams either ignore these standards or apply them uniformly across spaces with vastly different tasks.
A warehouse shipping dock needs 300 lux at ground level for package inspection, but the aisle leading to it needs only 100 lux. Using 300 lux everywhere wastes energy and creates hotspots. The cost difference between a properly sized installation and an oversized one compounds over years through wasted electricity and premature fixture replacement.
Real-Time Analysis Catches Errors Before Installation Begins
Real-time illuminance analysis before installation prevents both undersizing and oversizing errors. Modern photometric software lets you place fixtures in a 3D model of your actual space, account for existing reflectance from walls and floors, and verify illuminance at specific points and work surfaces. This takes 30 to 45 minutes and catches errors before a single fixture is mounted.
Teams that skip this step typically discover problems during commissioning, when crews are already on site and changes require rework, equipment returns, and project delays. The cost of software analysis-often free or under 500 dollars for a small project-vanishes against the cost of fixing an undersized or oversized installation after handover.
Platforms like OpenLumen let you upload luminaire photometric data, run instant illuminance calculations, and generate reports that validate your design against ASHRAE/IES standards. You verify performance without expensive desktop software or technical expertise. This validation step transforms lighting design from a risky guessing game into a predictable, repeatable process that protects your reputation and your margins.
With site conditions understood and fixtures properly validated, the next step is knowing exactly which tools and workflows prevent these mistakes from happening in the first place.
Software That Validates Your Design Before Ordering
Photometric analysis software transforms lighting design from assumption into certainty. The moment you stop relying on mental math and start running actual illuminance calculations against your space, errors vanish. Most teams resist this step because they assume it requires technical expertise or expensive desktop licenses. The reality is simpler: modern tools handle the complexity, and the time investment pays back instantly through eliminated rework.
Place Fixtures and Verify Performance in Real Time
Start with your space dimensions, ceiling height, wall and floor reflectance values, and window locations in analysis software. Then position your chosen fixtures at actual mounting heights and distances. The software calculates illuminance at work surfaces instantly, showing exactly where light lands and where gaps exist. ASHRAE/IES standards demand specific illuminance targets-300 lux for office tasks, 500 lux for detailed assembly work, 150 lux for warehouse aisles. Your analysis either confirms you hit these targets or reveals you’re falling short.
A 30-minute analysis catches undersizing errors before ordering, eliminating the costly emergency retrofit that typically costs 40 to 60 percent more than the original installation. Oversizing mistakes surface equally fast: if your analysis shows 600 lux in spaces requiring only 300, you’ve identified unnecessary fixtures and wasted energy that will compound across the fixture’s 50,000-hour lifespan.
Identify Energy Waste Before It Drains Your Budget
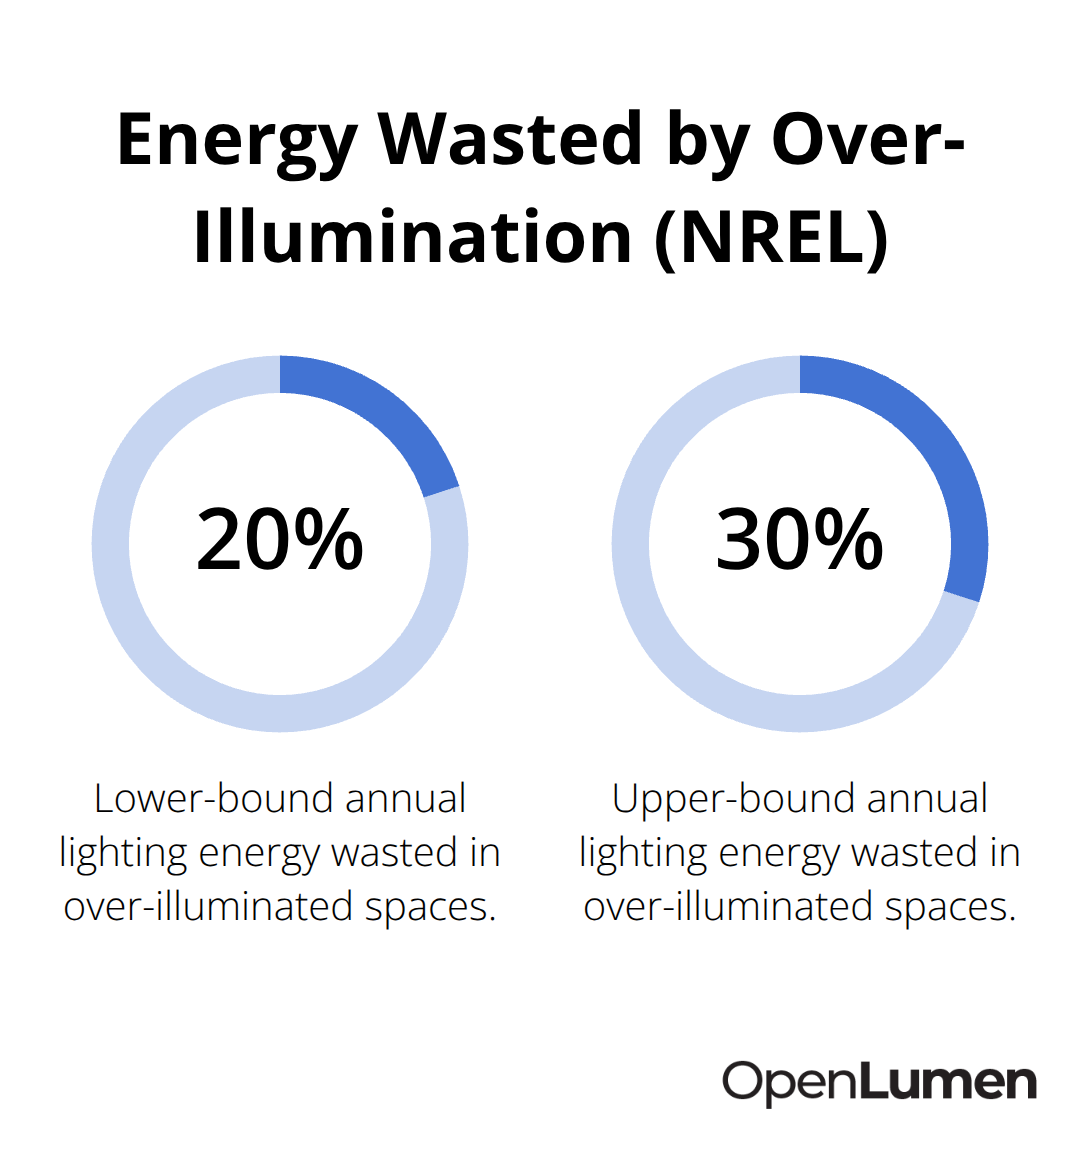
The NREL estimates that over-illuminated spaces waste approximately 20 to 30 percent of lighting energy annually. That’s not a minor inefficiency-it’s money leaving the project every single month. A browser-based platform lets you run this validation instantly without installing software or learning complex interfaces. You upload photometric data for any luminaire, position fixtures in your space model, and generate reports that prove your design meets standards.
The platform includes a community-verified luminaires library and instant access to polar charts and zonal lumen data, eliminating the hunt through manufacturer websites. Reports become your proof of performance-something you deliver to clients, architects, and facility managers as evidence the design will perform as promised.
Generate Reports That Protect Your Project Timeline
Teams that generate these reports before ordering close projects on time and within budget. Teams that skip this step discover problems during commissioning when the cost to fix them multiplies. The validation step isn’t optional complexity; it’s the difference between a lighting project that works and one that fails. Reports document your decisions, justify your fixture selections, and provide the documentation that architects and building officials require for project sign-off (reducing back-and-forth communication that delays approvals).
Final Thoughts
Lighting design mistakes cost contractors and property owners thousands in rework and delays, yet they remain entirely preventable. The three categories covered in this guide-ignoring site conditions, choosing fixtures without data, and skipping analysis-account for nearly every costly retrofit and timeline failure we see in the field. Teams that rush to specification without understanding what the space actually needs, select luminaires based on price rather than performance, and install fixtures without validating illuminance first inevitably face emergency repairs and client complaints.
The fix requires discipline, not complexity. Start every project with a 30-minute site survey that documents daylight availability, climate demands, ceiling height, and existing obstructions. Download photometric data for every fixture you consider and verify it delivers the required illuminance at your mounting height and distance from work surfaces. Run real-time illuminance analysis in your space model before ordering anything, and this three-step workflow eliminates guesswork and transforms lighting design into a repeatable, predictable process.
OpenLumen makes this validation step fast and accessible-a free, browser-based tool that lets you upload photometric data, position fixtures in your actual space, run instant illuminance calculations, and generate reports that prove your design meets ASHRAE/IES standards without expensive software or technical expertise. The platform includes a community-verified luminaires library so you spend less time hunting for data and more time designing. Start your next project with confidence and validate your design before installation.
The information provided is for general educational purposes only and should not be considered professional engineering or lighting design advice. Always verify project requirements, local codes, and specifications with qualified professionals before making final decisions.


