Getting lighting calculations right is the difference between a space that works and one that doesn’t. Most contractors and property owners either guess or rely on outdated rules of thumb, which leads to spaces that are either too dark or wastefully over-lit.
This lighting calculations tutorial walks you through the exact process we at OpenLumen use to size fixtures correctly. You’ll learn the metrics that matter, the formulas that work, and how to validate your design before installation.
Understanding Illuminance and Why It Matters
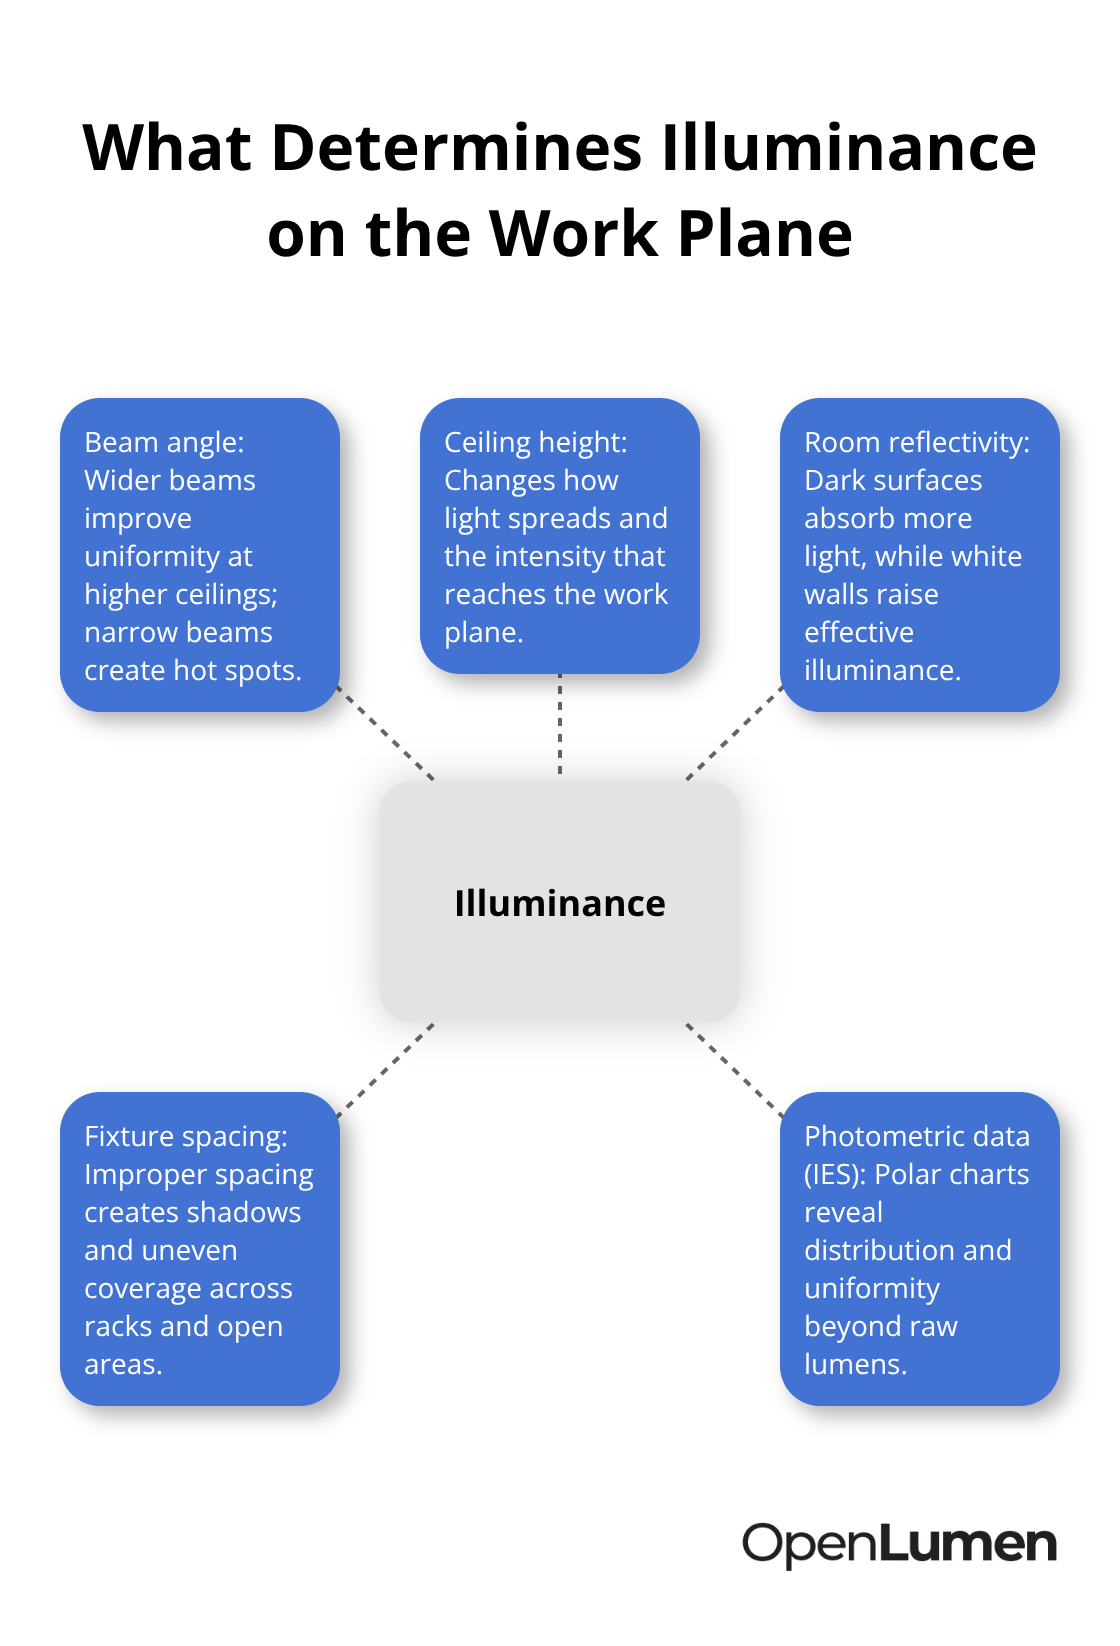
Illuminance is the amount of light falling on a surface, measured in lux or footcandles, and it’s the single most important metric you need to control. Most contractors miss this distinction: they focus on brightness or wattage, but illuminance is what actually determines whether a space functions. A warehouse needs 20 to 30 footcandles for basic tasks, while an inspection area in a manufacturing workshop demands 50 footcandles or higher. Get illuminance wrong, and you’ll either waste energy lighting empty space or force workers and customers into dim, unsafe conditions.
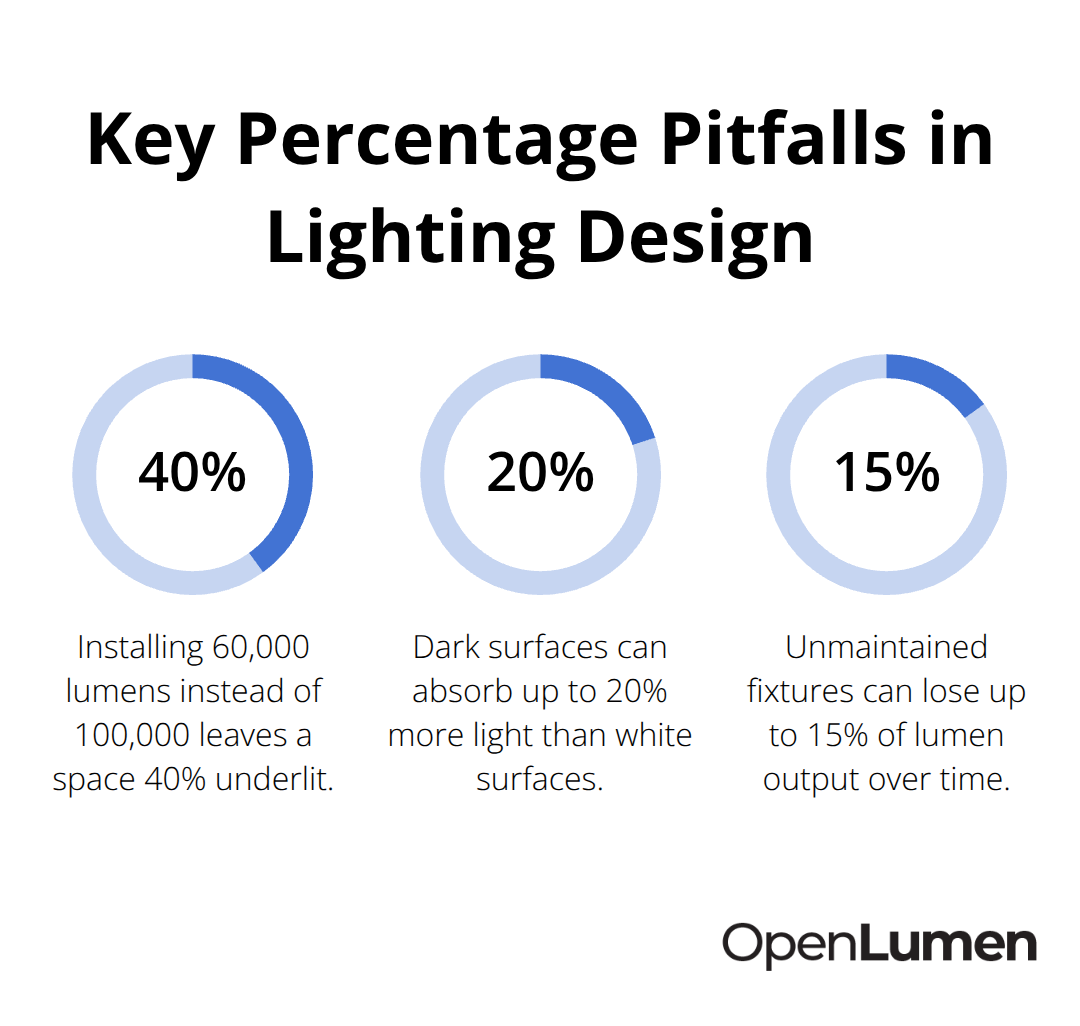
The IES standards are clear on this-they publish target footcandles by space type, and these aren’t suggestions. A 5,000 square foot warehouse at 25 footcandles with a standard 0.8 correction factor needs exactly 100,000 lumens. Skip the calculation, and you might install 60,000 lumens and think the space is adequately lit when it’s actually 40 percent underlit.
Lumens, Lux, and Candela Each Serve a Different Purpose
Lumens measure total light output from a fixture-that’s your starting point for any calculation. Lux measures how that light lands on a surface per square meter, while footcandles do the same in imperial units. Candela measures light intensity in a specific direction, which matters when you’re aiming spotlights or understanding how a fixture’s polar chart works.
Most people confuse these terms, which leads to ordering the wrong fixtures or miscalculating coverage. The correction factor (typically 0.7 to 1.0) accounts for fixture efficiency and room reflectivity, and it’s where most calculations fail. Dark surfaces absorb 10 to 20 percent more light than white surfaces, so a warehouse with dark concrete needs higher lumen output than one with reflective paint. LED high bay fixtures have correction factors closer to 0.8 because they distribute light more evenly than older HID systems, which ran 0.65 to 0.75.
IES Standards Provide Real Numbers You Can Trust
The IES publishes specific footcandle targets, and following them protects you legally and practically. Gymnasiums need 50 to 100 footcandles for visibility across large open areas. Manufacturing workshops need zoning-assembly areas at 30 footcandles, inspection zones at 50 or higher. Warehouses can run lower at 20 to 30 footcandles because tasks are less detail-intensive, but you still need wide beam angles from high ceilings to avoid shadows on tall racks.
BREEAM and LEED v4 add daylighting requirements, which means you can’t ignore natural light when calculating total illuminance. A space with south-facing windows at noon might hit 500 lux naturally, so your artificial lighting needs to supplement, not duplicate. Account for fixture degradation at 0.9 to maintain expected output over time-LED fixtures degrade slower than HID, but they still lose lumen output as dust accumulates and components age.
Maintenance Keeps Your Calculations Valid Over Time
Clean LED lenses quarterly to prevent lumen loss, and you’ll maintain compliance with standards for 50,000 hours or more. Monitor fixtures for flicker or dimming to catch performance issues early and maintain light levels. Dim high-ceiling LED lighting during off-hours to save energy and extend life.
These fundamentals set the foundation for accurate calculations. The next step is learning how to gather your space requirements and select the right luminaires for your application.
Sizing Your Space and Selecting the Right Fixtures
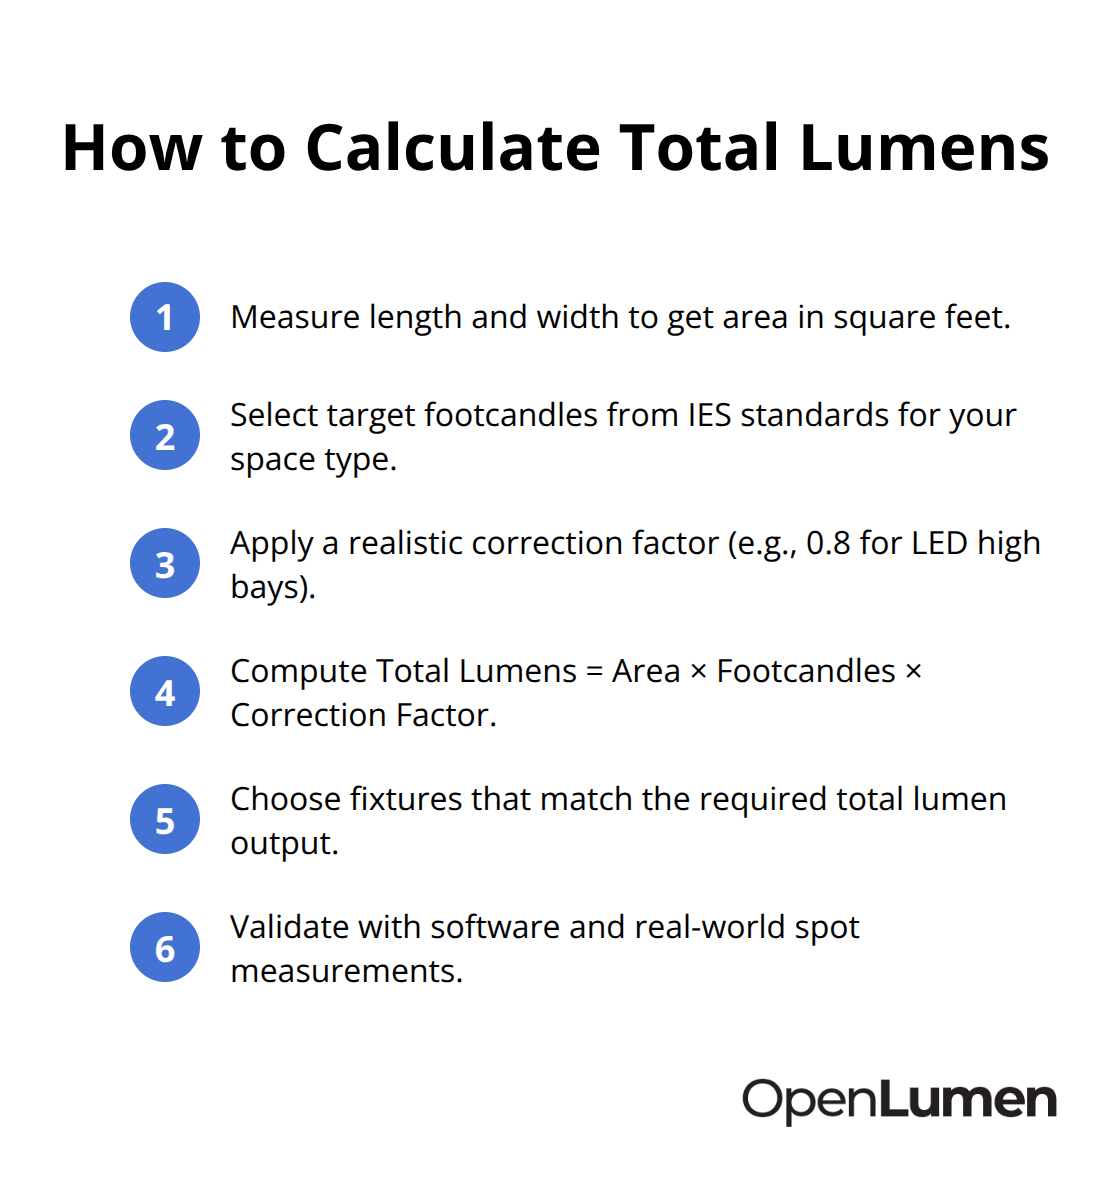
Start with the physical dimensions of your space because every calculation flows from this foundation. Measure length, width, and ceiling height, then multiply length by width to get your total area in square feet. For a 5,000 square foot warehouse with a 20-foot ceiling, you now have your baseline.
Identify Your Target Illuminance and Calculate Total Lumens
Next, identify your target illuminance from IES standards based on your space type-warehouses at 25 footcandles, manufacturing assembly areas at 30 footcandles, inspection zones at 50 footcandles or higher. Multiply your area by your target footcandles, then apply your correction factor (typically 0.8 for LED high bay fixtures, 0.65 to 0.75 for older HID systems). A 5,000 square foot warehouse at 25 footcandles with a 0.8 correction factor requires exactly 100,000 lumens. This formula-Area × Footcandles × Correction Factor = Total Lumens-is non-negotiable, and skipping it is why most installations underperform.
Dark concrete floors absorb 10 to 20 percent more light than reflective surfaces, so factor in your room’s actual reflectivity rather than guessing. Once you know your total lumen requirement, select fixtures that match this output.
Choose Fixtures That Match Your Lumen Requirement
LED UFO high bay lights rated at 20,000 to 25,000 lumens work well for tall warehouse spaces because they distribute light evenly and avoid the shadows that narrower beam angles create on tall racks. Check the manufacturer’s IES file (the photometric data file) to confirm the fixture’s actual output and beam angle before ordering-this prevents the costly mistake of installing underpowered or oversized fixtures.
Account for Room Reflectivity and the Coefficient of Utilization
The inverse square law matters less in practice than most texts suggest because it applies only to point sources in open space. In real rooms with reflective surfaces, walls bounce light back onto your work plane, which actually increases illuminance beyond what the inverse square law predicts. Your correction factor accounts for this reflection, which is why 0.8 is standard for typical warehouse interiors with moderate reflectivity.
If you design a space with very dark walls or absorptive materials, lower your correction factor to 0.7 and recalculate. Conversely, a warehouse with white painted walls and reflective ceilings might justify 0.85 or higher. The coefficient of utilization is embedded in your correction factor-it reflects how efficiently the fixture’s light reaches the work plane given the room’s geometry and surface properties.
Plan for Depreciation and Maintenance
Plan for depreciation by applying a 0.9 maintenance factor to account for lumen loss over time. LED fixtures maintain output longer than HID (50,000+ hours versus 15,000 hours), but dust accumulation on lenses and aging components still reduce output. A quarterly cleaning schedule keeps your installation compliant with standards and prevents the 10 to 15 percent lumen loss that occurs when fixtures go unmaintained.
Once you calculate total lumens and select fixtures, the next step is to validate your design before installation. Photometric software or real-world spot measurements in similar spaces separate confident installations from guesswork, and this validation process is where most designs either prove themselves or reveal hidden problems.
Validating Your Design With Real Data
Photometric data from manufacturer IES files separates accurate designs from guesswork. Every fixture contains a polar chart inside its IES file that shows how light distributes in different directions, and this chart reveals whether a 20,000-lumen fixture actually delivers uniform coverage or creates hot spots and dark zones. Many contractors order fixtures based on lumen ratings alone, then wonder why a warehouse still has shadows on tall racks despite hitting the target footcandle average. The polar chart tells you the beam angle, which determines whether a high bay fixture spreads light evenly across your space or concentrates it in a narrow cone. A narrow 40-degree beam angle works for a 12-foot ceiling but fails at 25 feet, where it creates a bright circle surrounded by darkness.
Download and Compare IES Files Before Ordering
Download the IES file from the manufacturer’s website before ordering, and check both the lumen output and the beam angle against your ceiling height and spacing calculations. Most LED high bay manufacturers like Zumtobel publish detailed IES files that let you compare fixture performance side by side. If the manufacturer doesn’t provide an IES file, that’s a red flag-it means they’re hiding photometric weaknesses or don’t meet professional standards.
Use Software to Eliminate Manual Calculations
Lighting design software accelerates validation and removes arithmetic errors from your layout. Instead of manually calculating illuminance at dozens of points across your space, the software generates a pseudo-color map showing exactly where light lands and where dark zones exist. You input your room dimensions, select fixtures from a community-verified luminaires library, and the software instantly calculates illuminance at every point on your work plane-no spreadsheets, no hand calculations, no margin for error. OpenLumen provides this capability as a free, browser-based platform with instant photometric analysis and professional report generation.
Validate Calculations With Real-World Measurements
Real-world measurements in similar existing spaces confirm your calculations before installation and protect you against surprises. Measure footcandles at multiple points across an installed warehouse or manufacturing space using a handheld light meter, then compare those readings to your software predictions. If your calculation predicted 28 footcandles at a specific point and the meter reads 26, you have confidence that your design methodology works. If the meter reads 18, your correction factor was too optimistic or your fixture spacing was wrong (this validation loop takes an hour in an existing space and prevents costly redesigns after installation).
Many contractors skip this step because it feels redundant, but a single failed installation-where workers complain about inadequate light or you’re forced to add fixtures mid-project-costs far more than the time spent validating your design in advance.
Final Thoughts
Lighting calculations work when you follow the formula: measure your space, identify your target illuminance from IES standards, apply your correction factor, and validate before installation. Most failures happen because contractors skip one of these steps or rely on outdated rules of thumb instead of actual photometric data. The difference between a well-lit warehouse and an underlit one is often just 15 to 20 percent in lumen output, which means your calculation accuracy directly impacts worker safety and energy costs.
The most common mistake is confusing lumen output with actual illuminance on your work plane. A 20,000-lumen fixture does not guarantee 25 footcandles across your space-beam angle, ceiling height, room reflectivity, and fixture spacing all determine what actually lands on your floor. Download the manufacturer’s IES file before you order, not after. Check the polar chart to confirm beam angle matches your ceiling height. Apply a realistic correction factor based on your room’s actual surface colors and reflectivity, not a generic 0.8. Account for depreciation and plan quarterly maintenance to keep your installation compliant over time.
The second mistake is skipping validation. Real-world spot measurements in similar spaces take an hour and prevent costly redesigns after installation. Software validation eliminates arithmetic errors and shows you exactly where dark zones exist before you order fixtures. OpenLumen lets you run photometric analysis instantly, compare fixture performance side by side, and generate professional reports without expensive software or technical expertise-start your next lighting calculations tutorial project by measuring your space, pulling IES files for candidate fixtures, and running a quick photometric analysis to confirm your design works.
The information provided is for general educational purposes only and should not be considered professional engineering or lighting design advice. Always verify project requirements, local codes, and specifications with qualified professionals before making final decisions.


