Lighting design mistakes cost money and damage project outcomes. Poor planning leads to installations that don’t perform, waste energy, or require expensive fixes after completion.
At OpenLumen, we’ve seen how the right approach prevents these problems. This guide walks you through the decisions that matter most-from site assessment to final documentation-so your projects succeed the first time.
Common Lighting Design Mistakes
Site Conditions Shape Every Design Decision
Site conditions determine everything in lighting design, yet many projects skip this step entirely. You cannot design effectively without understanding the space’s dimensions, surface reflectance values, existing daylight patterns, and intended use. The Illuminating Engineering Society (IES) recommends conducting a full site assessment before selecting a single luminaire. This means measuring room dimensions, checking wall and ceiling colors (reflectance affects illuminance by 20–40%), and documenting any architectural obstacles that block light distribution.
A warehouse with concrete walls reflects far less light than one with white painted surfaces, yet designers often apply identical fixture spacing to both. The result: one space receives insufficient light while the other wastes energy. This mistake happens because designers skip the reflectance measurement step and rely on assumptions instead.
Color Temperature and CRI Errors Ruin User Experience
Color temperature and color rendering index (CRI) mistakes compound performance problems. Most designers pick 4000K as a default without considering the space’s function. An office performing detailed color-critical work needs 4000–5000K with a CRI of 85–90 to ensure accurate color perception, according to IES guidelines. A hospitality space demands 2700–3000K for warmth and comfort.
Picking the wrong combination creates spaces that feel harsh, uninviting, or too dim for actual tasks. Projects with 5000K lighting in retail environments drive customers away, while 2700K in industrial workspaces causes safety issues because workers cannot distinguish colors accurately. The mismatch between design intent and actual function wastes money and creates liability.
Maintenance and Depreciation Destroy Long-Term Performance
Maintenance and depreciation destroy designs that ignore them from the start. LED luminaires lose 10–15% of their initial brightness within the first 1,000 hours and continue degrading over their 50,000-hour lifespan. If your design assumes peak lumen output without accounting for this decay, the space becomes progressively darker.
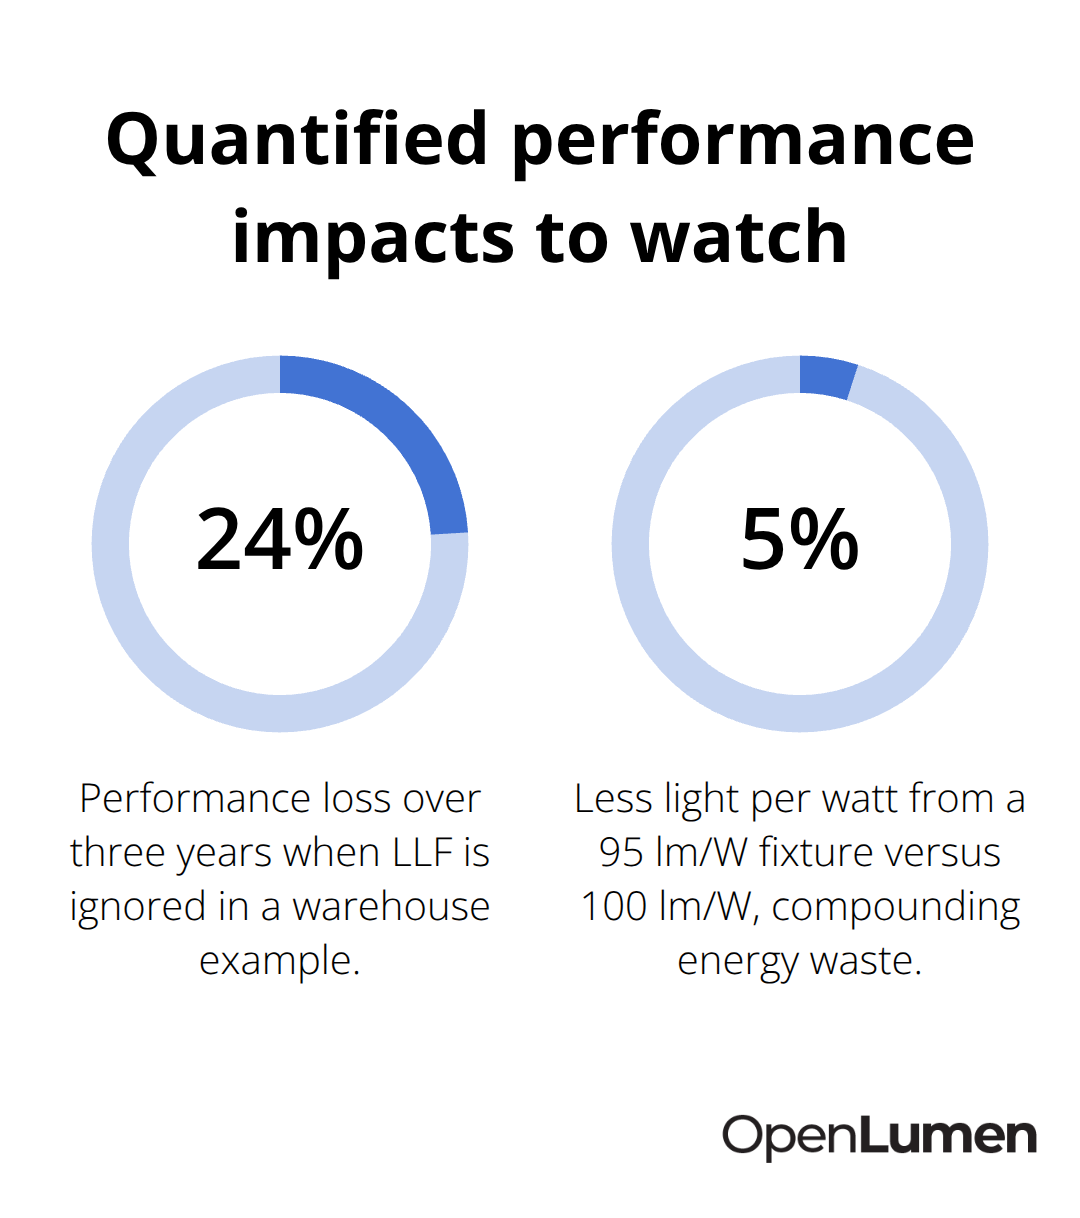
IES standards require designers to calculate light loss factors (LLF) that account for luminaire dirt depreciation and LED lumen depreciation. A warehouse designed without LLF calculations might deliver 500 lux initially but drop to 380 lux after three years as dust accumulates on fixtures and LED output declines-a 24% loss in performance.
Maintenance access also matters: if fixtures mount where cleaning requires scaffolding or equipment, they won’t receive regular maintenance, accelerating the performance gap.
Validation Prevents Costly Corrections
Real projects demand photometric validation before installation begins. This step catches errors early when changes cost little instead of after walls open and fixtures arrive on site. The next section explains how to plan lighting layouts effectively so validation confirms your design works as intended.
How to Plan Lighting Layouts That Actually Work
Conduct a Thorough Site Assessment Before Design Begins
Measure room dimensions precisely, document surface reflectance values for walls and ceilings, and photograph existing conditions. Record ambient daylight patterns at different times of day because north-facing spaces behave entirely differently from south-facing ones-the IES Lighting Handbook emphasizes this distinction. Identify architectural features that affect light distribution, such as columns, alcoves, or equipment that blocks light paths.
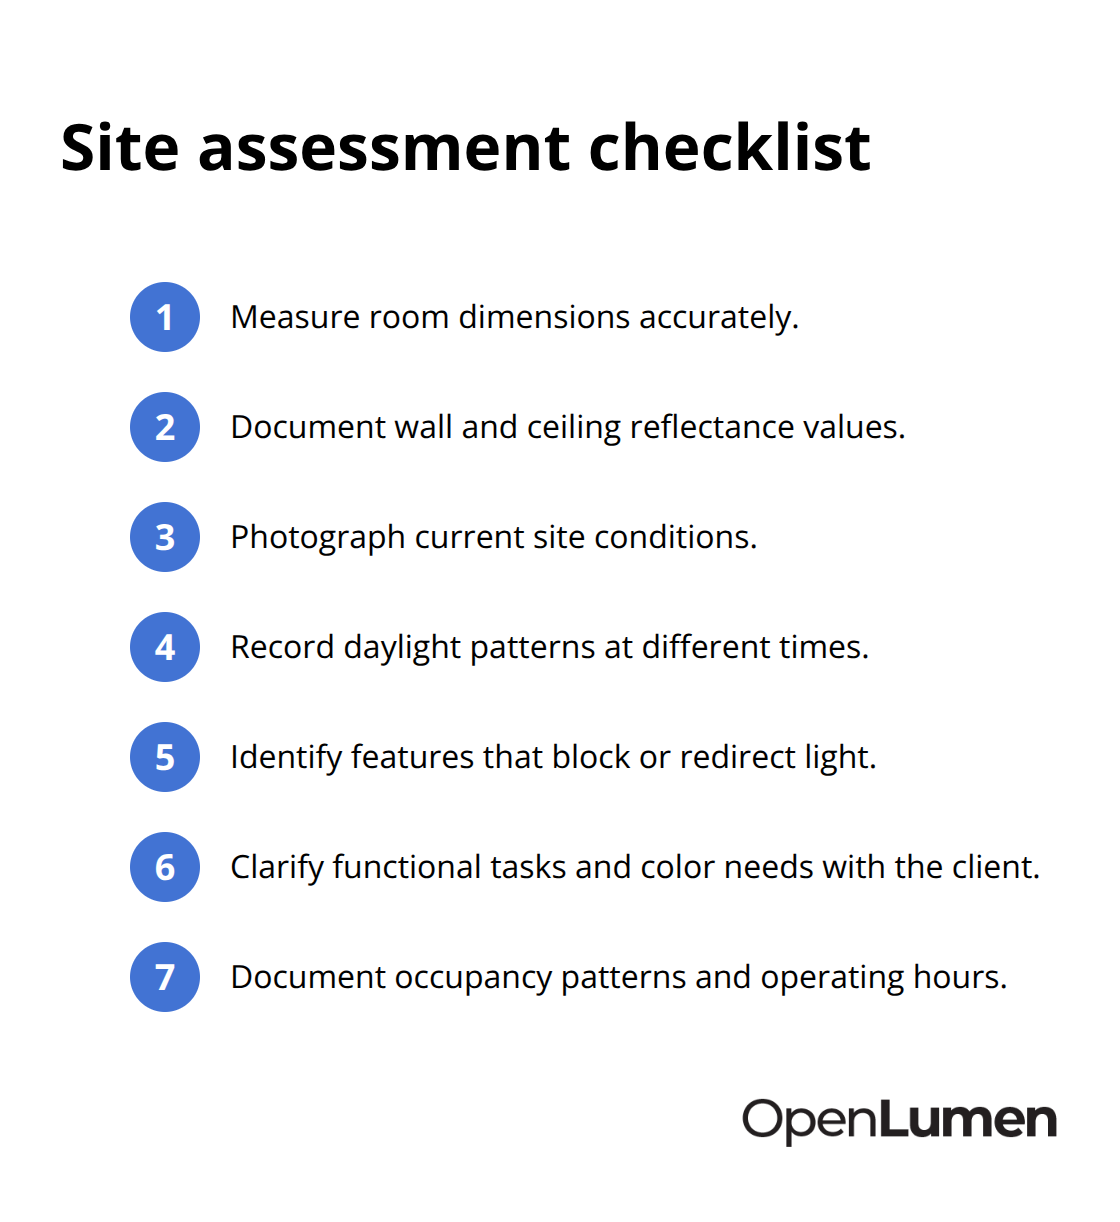
Ask your client specific questions about the space’s function. Is this a task-critical area where color accuracy matters, or a circulation space where general visibility suffices? Document occupancy patterns too-a warehouse used 24/7 needs different luminaire selection than one operating during daylight hours only. This information becomes your design foundation and prevents the generic fixture layouts that fail when installed.
Validate Your Design with Photometric Analysis
Use photometric analysis to test your design before ordering a single luminaire. Run calculations for your specific reflectance values, mounting heights, and spacing distances to confirm that your layout delivers the required illuminance levels. The IES recommends 300–500 lux for general office tasks and 500–750 lux for detailed color-critical work.
Test your design against worst-case scenarios by accounting for light loss factors that include LED lumen depreciation (10–15% within the first 1,000 hours) and luminaire dirt accumulation (typically 5–10% annually in standard environments). If your analysis shows the space drops below required illuminance after three years of operation, increase fixture quantity now rather than discovering the problem after installation.
Balance Performance Against Budget Constraints
Compare luminaire efficacy ratings to maximize energy efficiency and reduce long-term operating costs. Select fixtures rated 100 lm/W or higher. This approach lets you meet performance targets without unnecessary expense.
Document your photometric calculations and luminaire selections in a professional report that contractors and distributors can reference during procurement and installation. This eliminates confusion about quantities, spacing, and performance expectations-and sets the stage for the next critical step: selecting the right luminaires for your specific application and environment.
Best Practices for Lighting Design Projects
Select Appropriate Luminaires Based on Application and Environment
Luminaire selection determines whether your design succeeds or fails after installation. The wrong fixture type wastes energy, creates glare, or delivers insufficient light even if your photometric calculations were perfect. Match luminaire type to specific application requirements rather than defaulting to whatever is cheapest or most readily available. Industrial spaces with high dust or humidity demand enclosed fixtures with IP65 ratings or higher to prevent dirt accumulation and corrosion, according to IES maintenance guidelines. Retail environments with color-critical merchandise require fixtures with CRI 90 or above and narrow beam angles to highlight products without creating harsh shadows. Office spaces performing detailed tasks need fixtures with low unified glare ratings (UGR below 19) and diffusers that soften direct light.
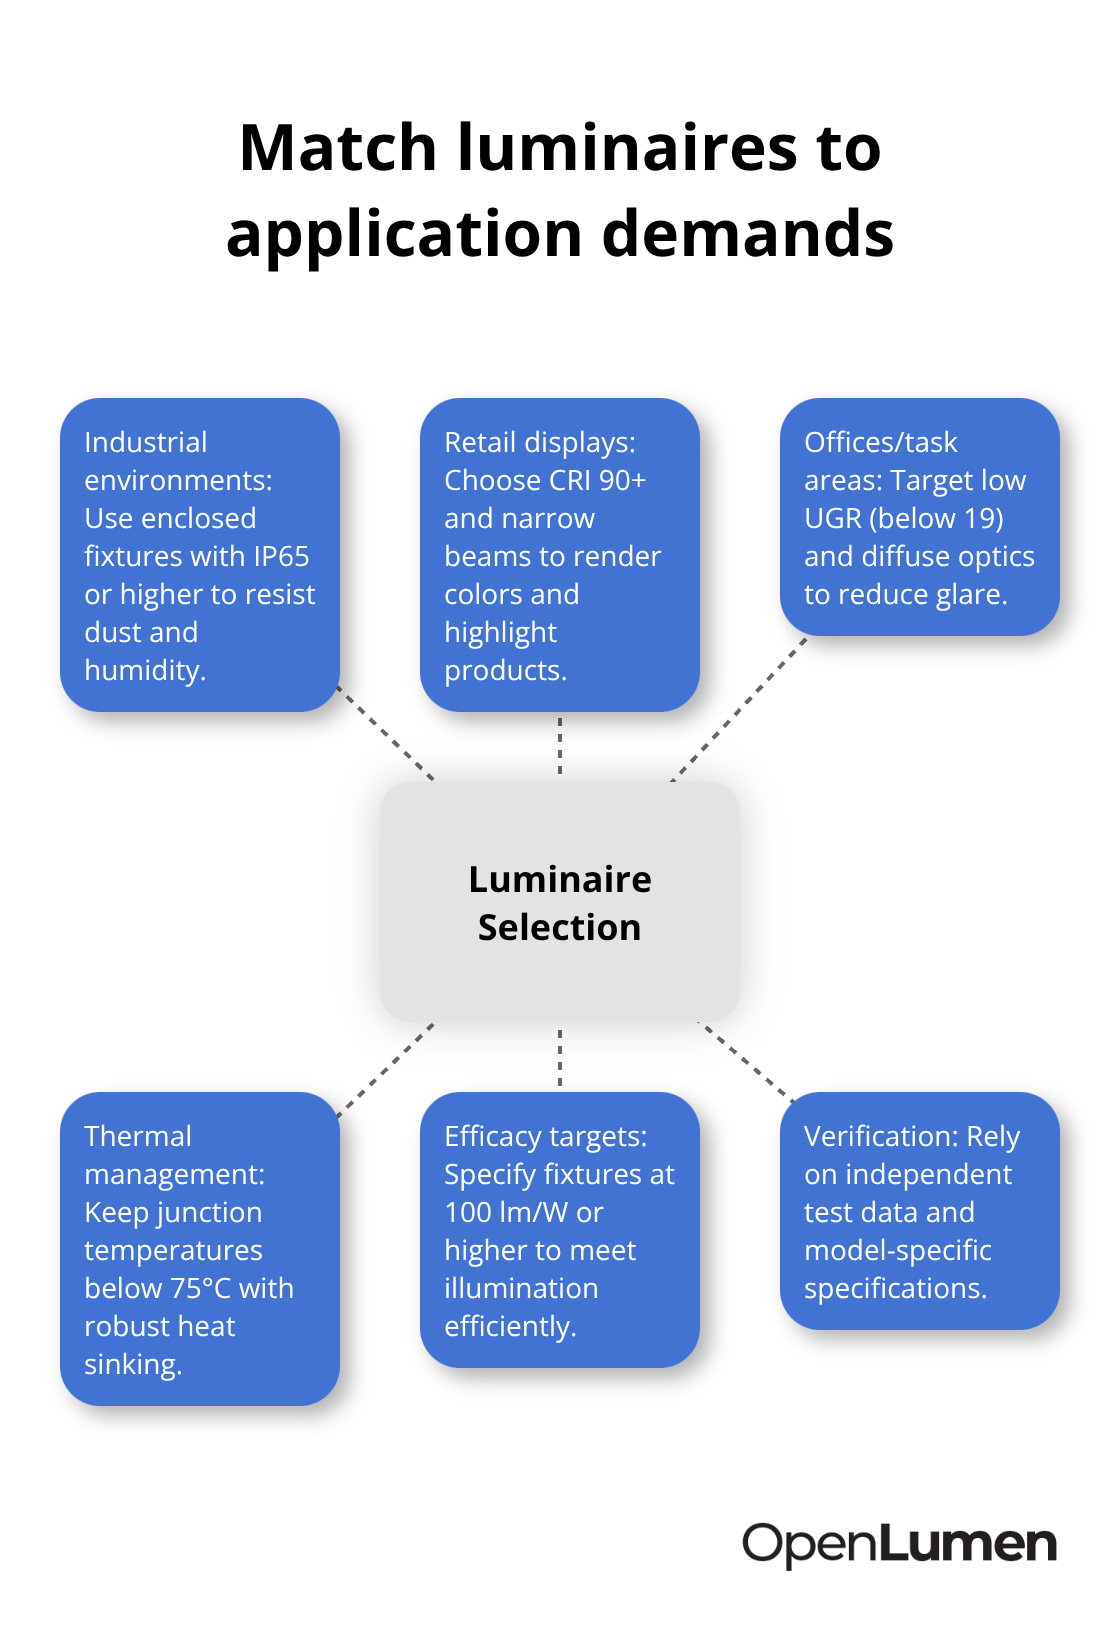
Each environment has distinct thermal, optical, and performance demands that generic fixture selection ignores.
Efficacy ratings separate efficient designs from wasteful ones. Select luminaires rated 100 lm/W or higher and verify these ratings come from independent testing rather than manufacturer claims alone. A fixture rated 95 lm/W costs slightly less upfront but delivers 5% less light per watt, compounding energy waste across hundreds of fixtures over a 50,000-hour lifespan. For a warehouse with 200 fixtures operating 16 hours daily, this 5% difference costs approximately 8,000–12,000 kWh annually depending on regional electricity rates. Thermal management quality separates reliable fixtures from ones that degrade prematurely. LED junction temperatures above 75°C accelerate lumen depreciation and shorten lifespan, so fixtures with active heat sinking and robust thermal paths outperform cheaper alternatives with minimal thermal design. Request thermal resistance specifications and verify they align with your climate and mounting conditions.
Document Your Design Process with Professional Reports
Professional reports eliminate ambiguity between design intent and installation reality. Document your photometric calculations, including reflectance values used, light loss factors applied, and resulting illuminance maps showing coverage across the space. Include luminaire specifications with model numbers, quantities, mounting heights, and spacing distances so contractors order exactly what you designed rather than substituting alternatives. Specify color temperature, CRI, and beam angle requirements so no confusion exists about performance expectations. Add maintenance schedules that identify when fixtures require cleaning and when LED output should be re-measured to confirm performance hasn’t dropped below acceptable thresholds. This documentation protects your reputation and prevents costly field corrections that arise when contractors improvise because design information was incomplete or unclear.
Collaborate with Contractors and Distributors Early in the Process
Contractors and distributors possess on-site knowledge and procurement experience that designers often lack. Involve them during site assessment to identify installation challenges, electrical limitations, or cost constraints before finalizing your fixture selections. A distributor familiar with local inventory knows which luminaire models ship within two weeks versus those requiring eight-week lead times, letting you adjust specifications before the client approves the budget. A contractor can flag mounting obstacles, existing electrical capacity limits, or code compliance issues that affect feasibility. Their input prevents designs that look perfect on paper but face installation delays or require expensive modifications. Share your photometric analysis and luminaire specifications with contractors and distributors early so they can provide accurate labor estimates and procurement timelines rather than discovering problems after purchase orders are placed. This collaboration transforms your design from a theoretical exercise into a practical project that installs on schedule and within budget.
Final Thoughts
Lighting design mistakes happen when projects skip the fundamentals. Site assessment, photometric validation, and proper luminaire selection separate successful installations from costly failures. The three errors covered in this guide-ignoring site conditions, mismatching color temperature and CRI, and overlooking maintenance depreciation-account for the majority of performance problems we see in the field.
Following a structured approach prevents these errors and delivers measurable results. When you measure reflectance values, run photometric analysis before installation, and select luminaires matched to your specific application, your designs perform as intended. Documentation and early collaboration with contractors and distributors catch problems while they’re still inexpensive to fix, and this systematic process eliminates expensive field corrections that emerge months after installation.
The tools available today make this structured approach accessible to everyone-OpenLumen provides free photometric analysis and professional reporting without expensive software or complex workflows, letting you validate designs in real time and generate documentation that contractors can reference during installation.
The information provided is for general educational purposes only and should not be considered professional engineering or lighting design advice. Always verify project requirements, local codes, and specifications with qualified professionals before making final decisions.


